

Last updated on
Create a Connector
Create a Custom Connector to give an AI Fellow access to a specific action or information in another system. Define what it should do and when the Fellow should use it, then work with your IT team to provide the connection address (endpoint), authentication token, and required fields. You can reuse the saved Connector across AI Fellows and Learning Paths.
Owners, Full Admins, and Creators can create custom Connectors. Managers cannot open the Connectors Library. The setup steps below cover the form; the response-format section provides the technical details your IT team needs.
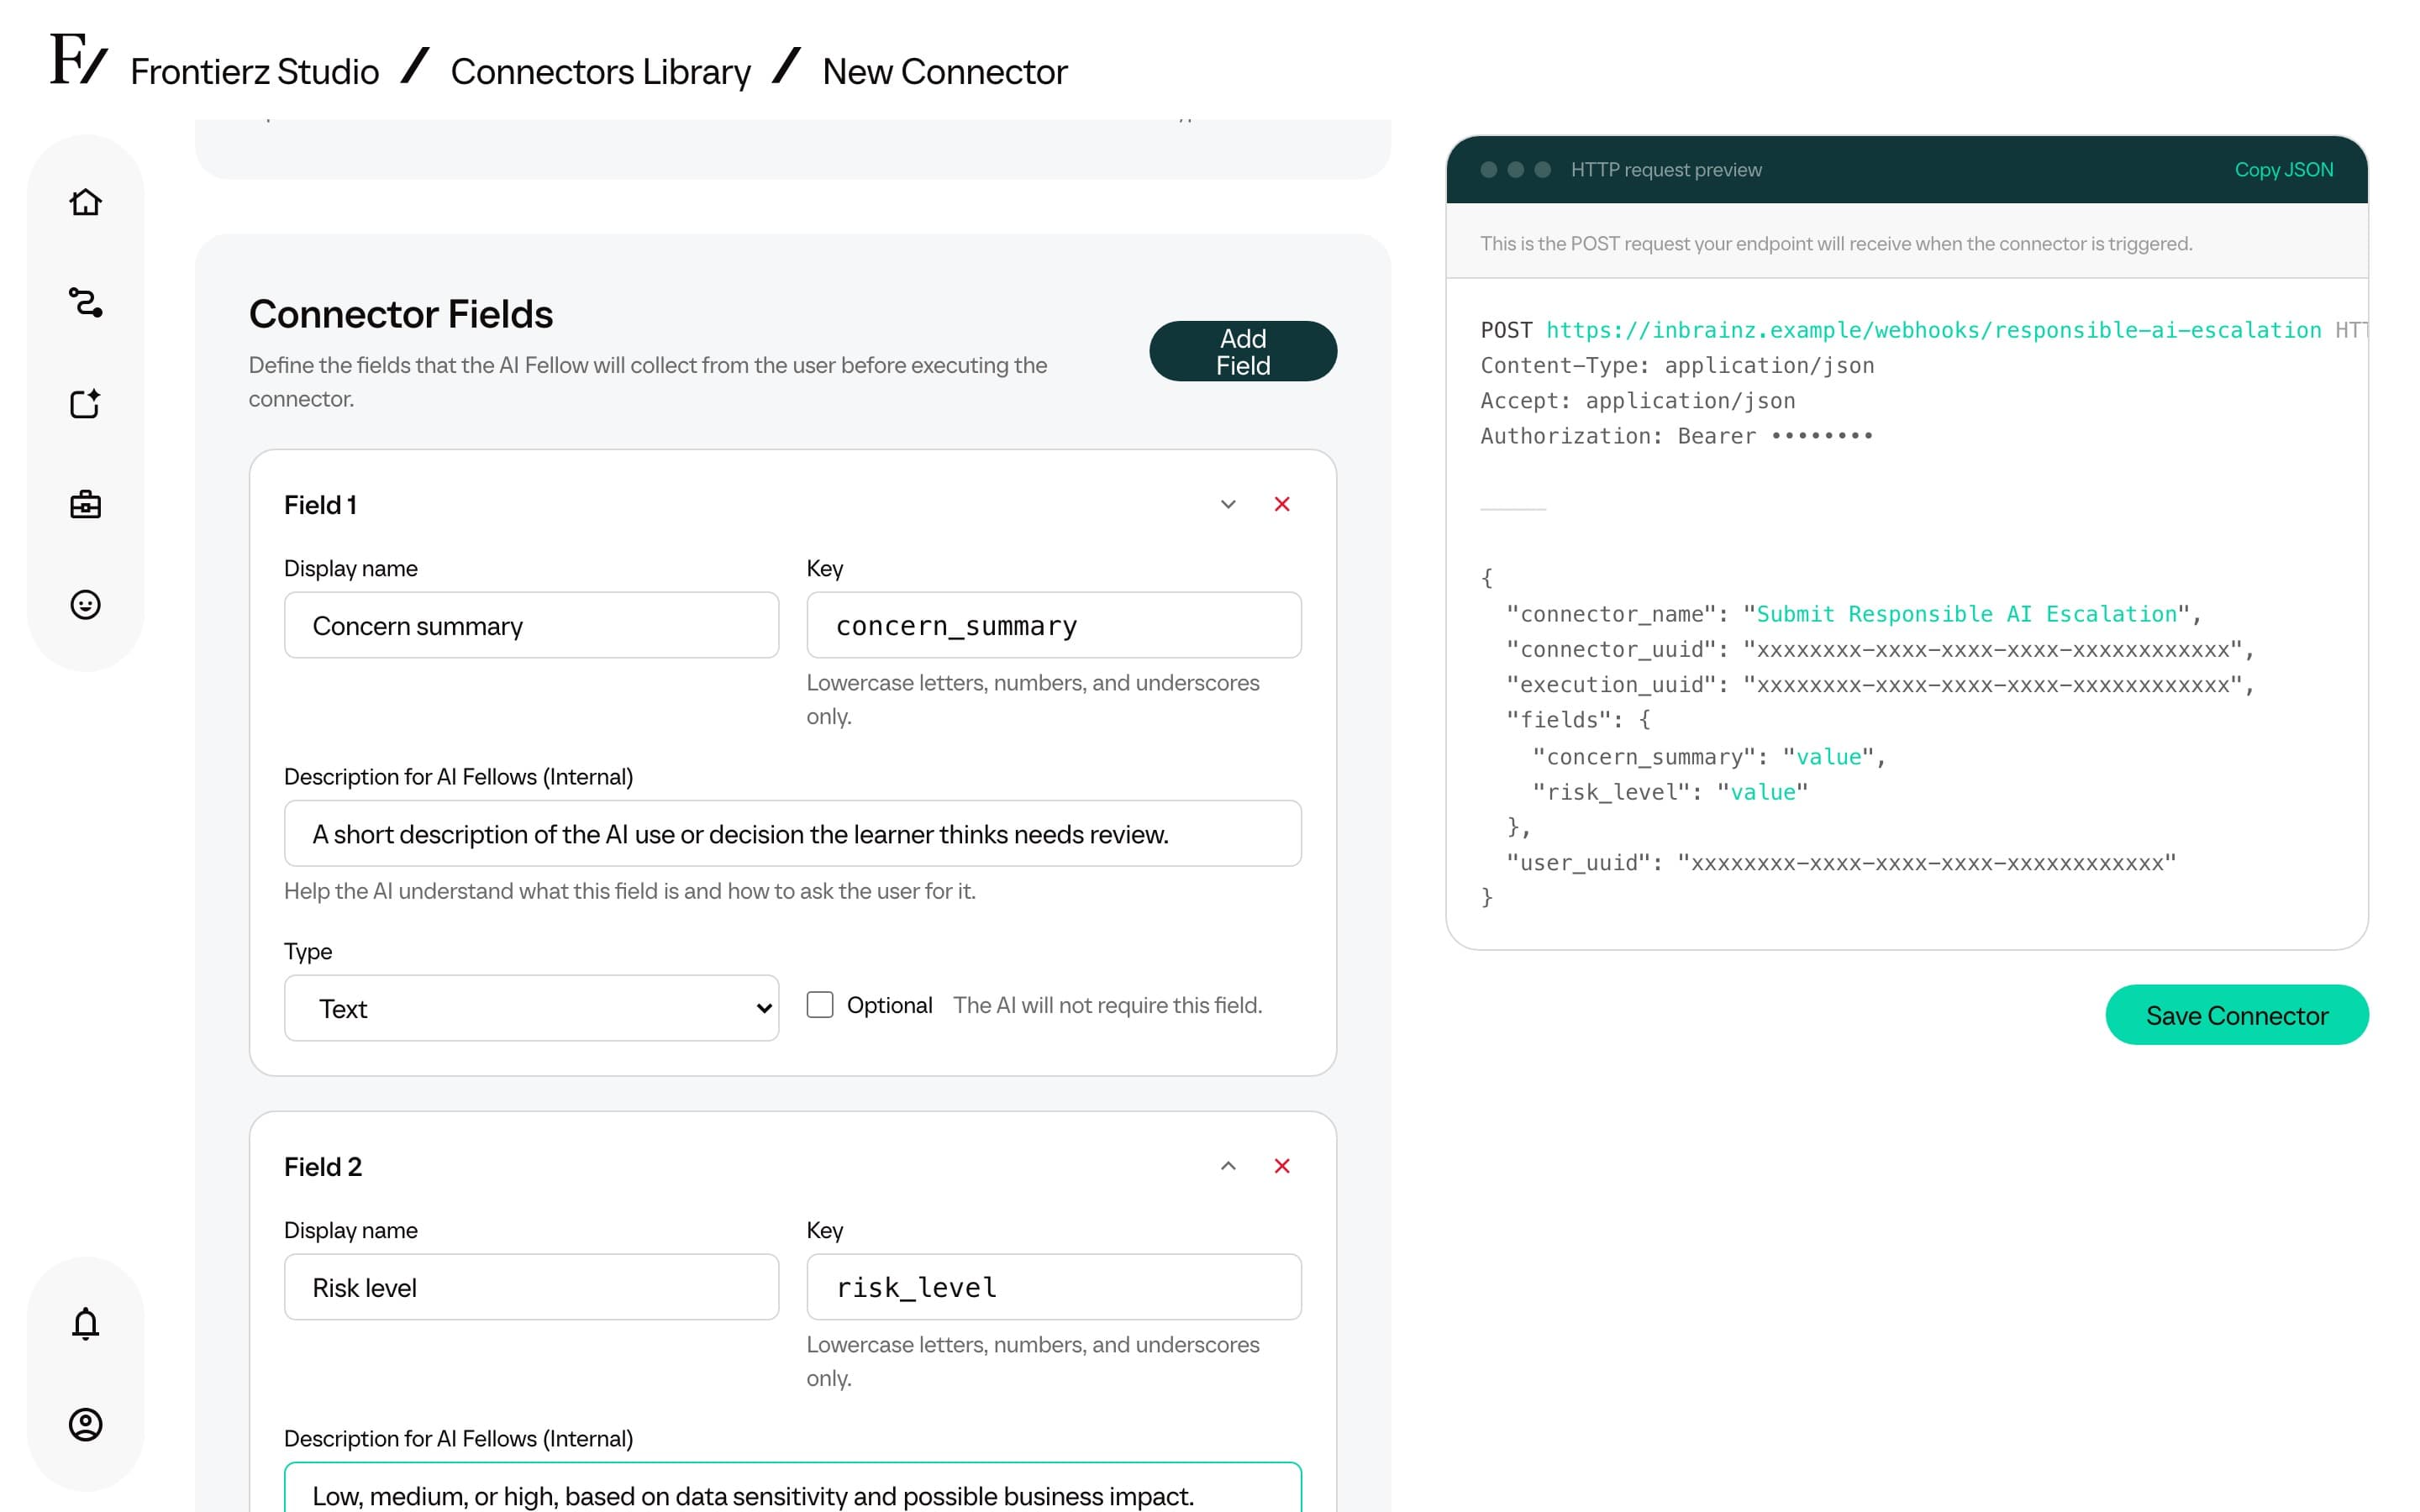
Click New Connector.
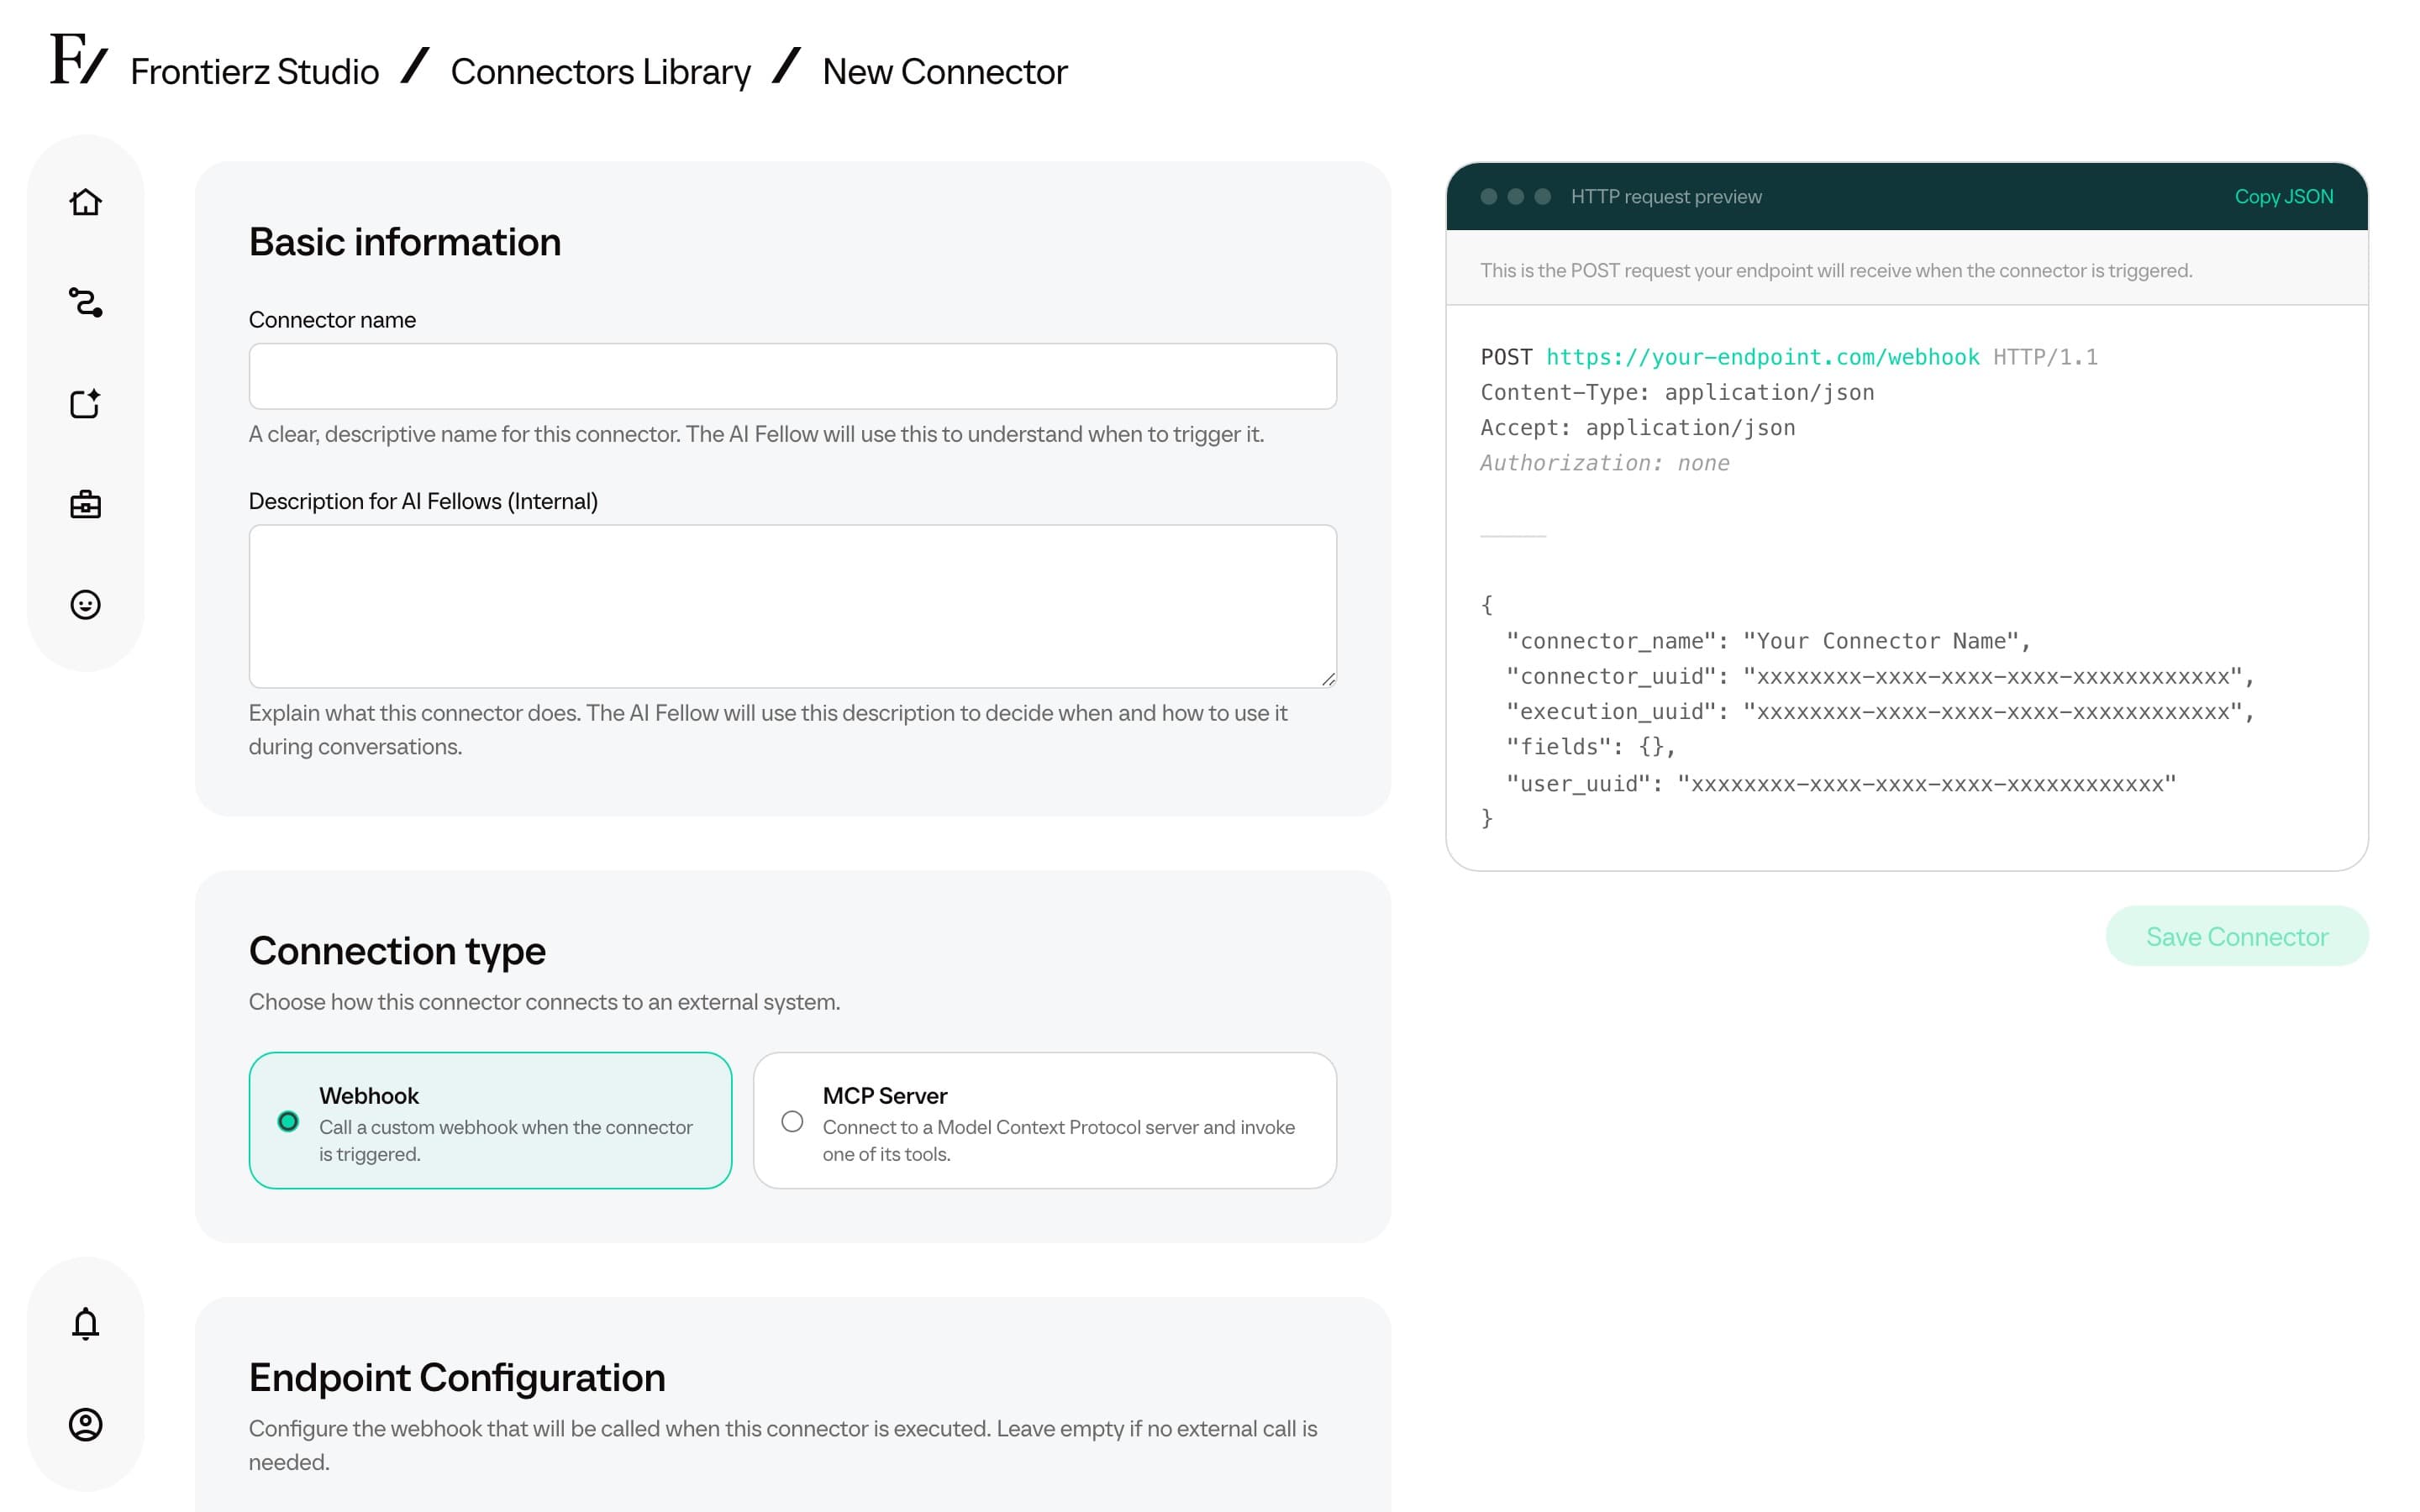
Provide a description. The AI Fellow uses this description to determine when to use the Connector during a conversation. The description must be specific and written in plain language.
Select the type:
- Webhook for a direct HTTP call to an endpoint controlled by your organisation.
- MCP Server for a connection to an AI-compatible data source over the Model Context Protocol.
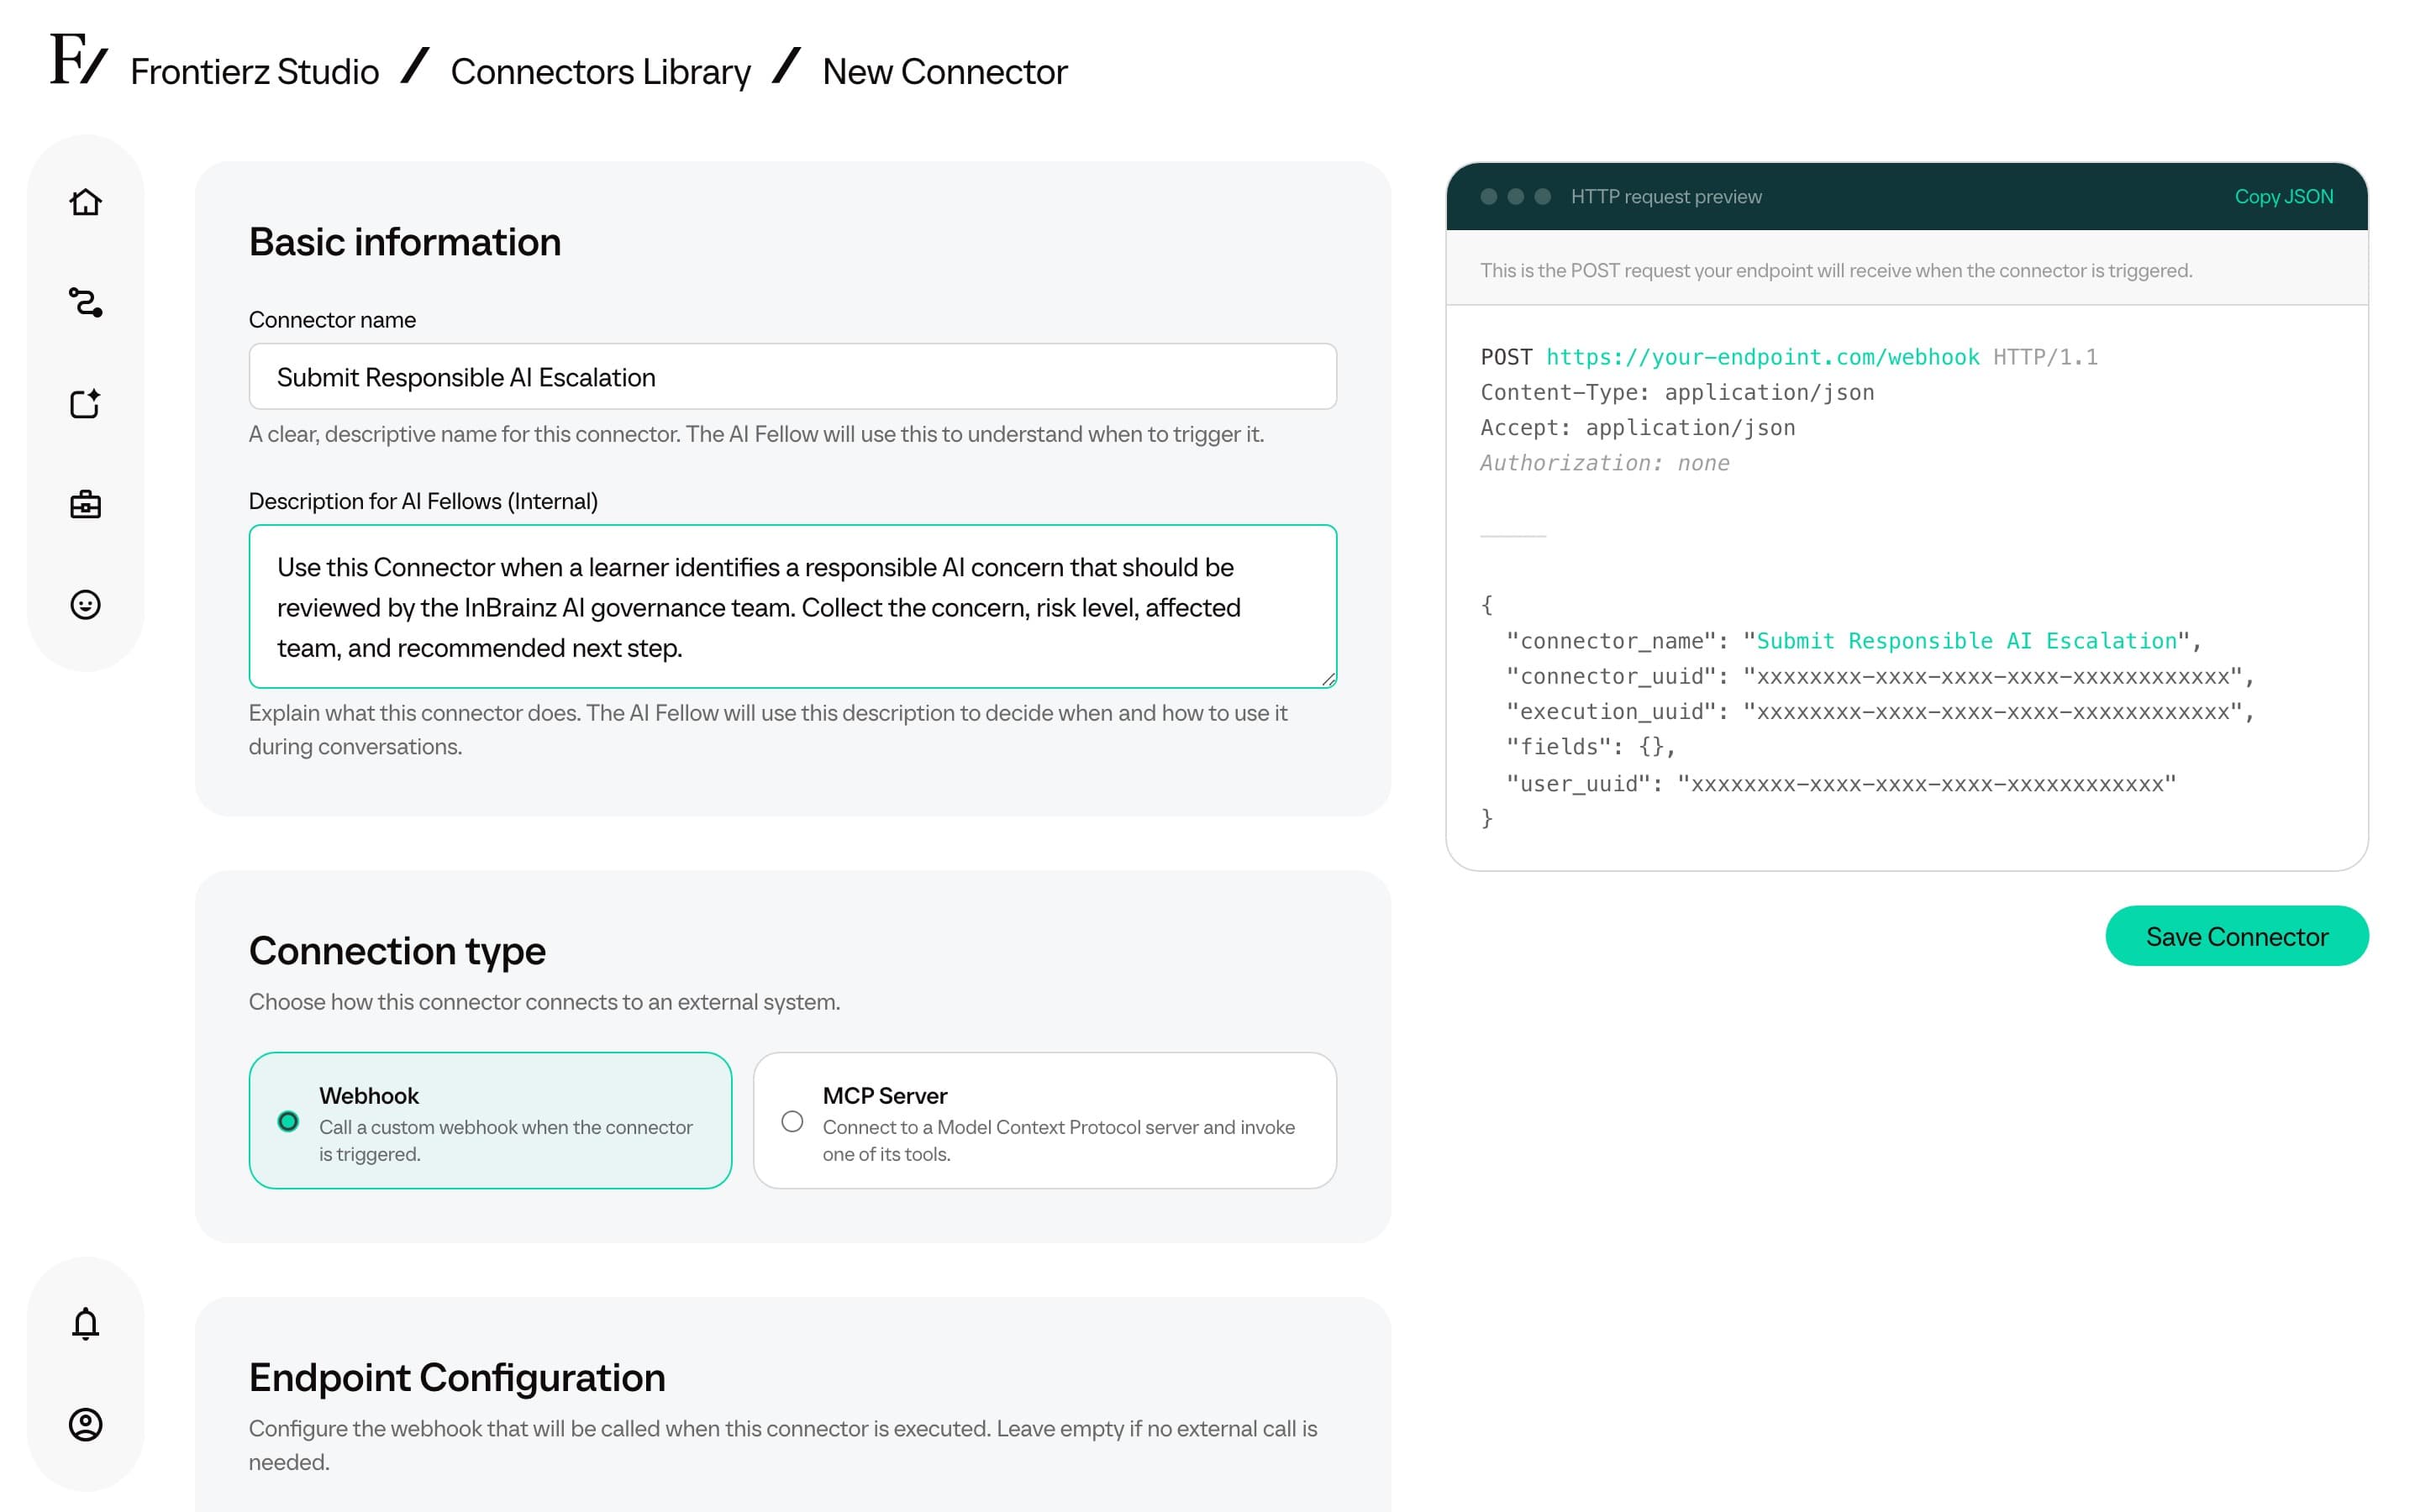
Provide the endpoint, then choose under Authentication how the Connector signs its requests: Bearer token or OAuth 2.0. See Choose how the Connector signs in.
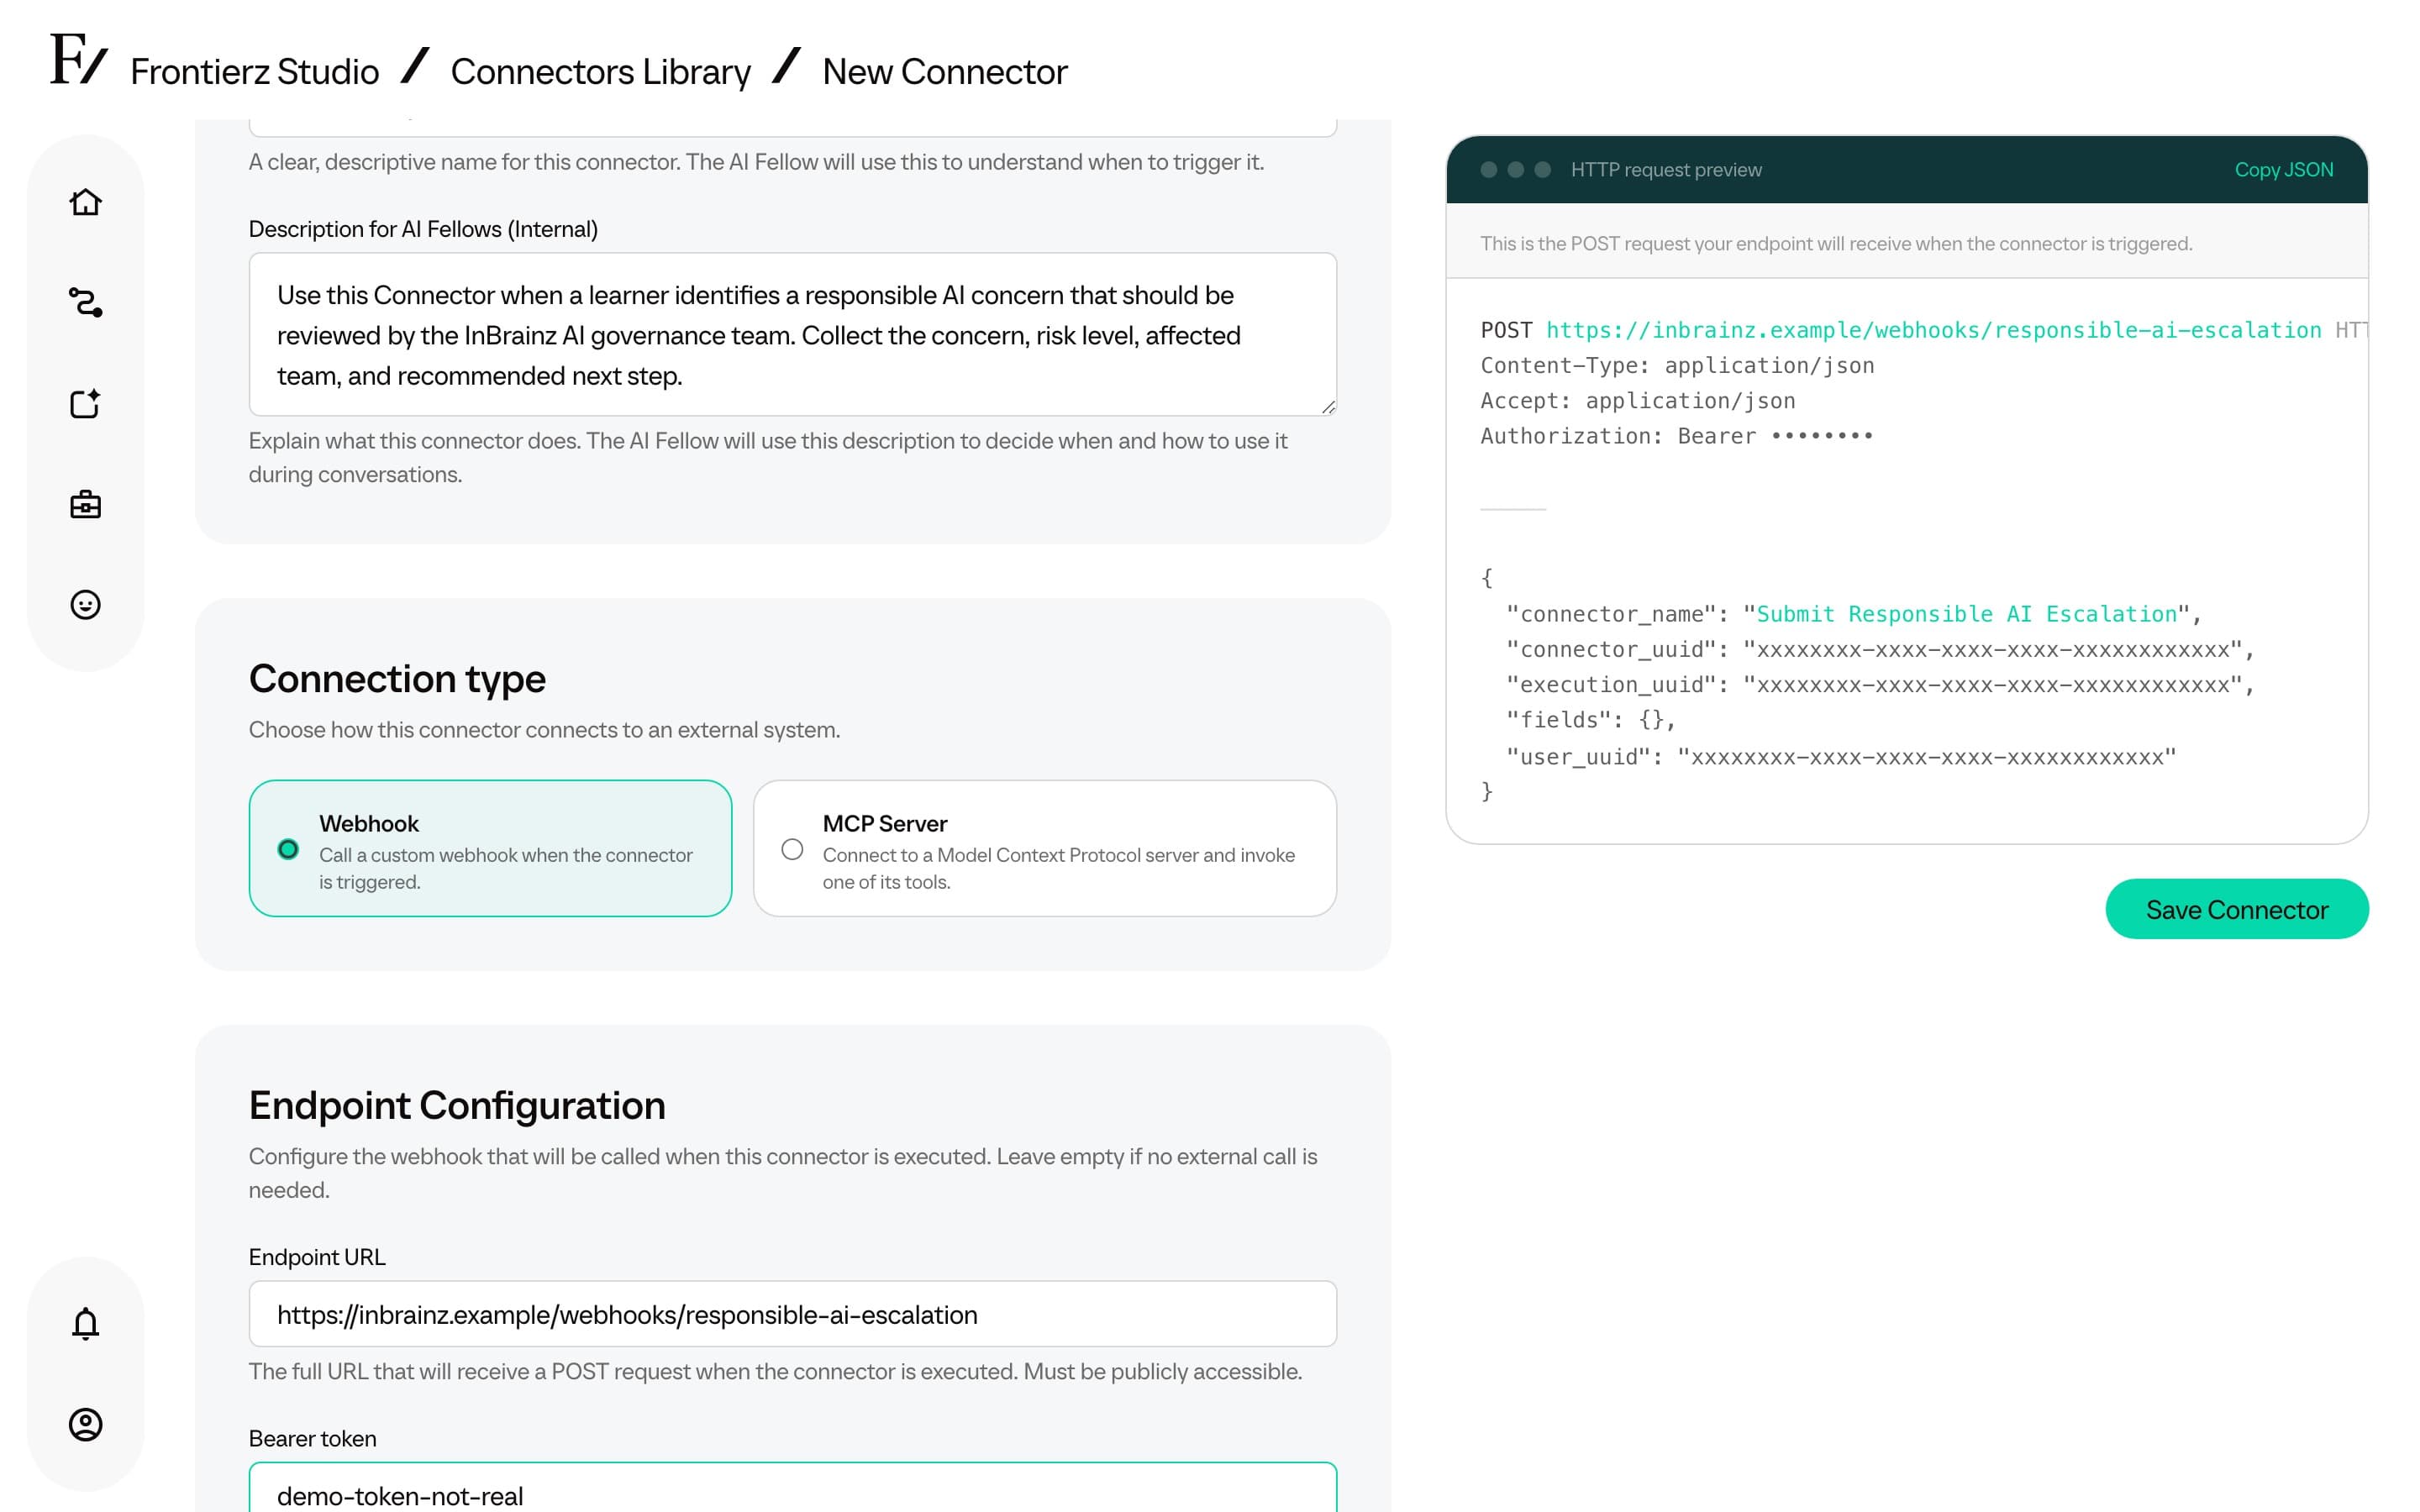
Optionally, define the input fields the AI Fellow needs to gather from the user before invoking the Connector (such as an account ID, a date range, or any other required data). Each field can also carry a fixed value that is sent on every call without the AI Fellow being involved.
Explain the action and the information it needs. For example, returns the customer’s open tickets using their account ID gives the Fellow a clearer instruction than calls the CRM. Test the description with realistic requests before making the Connector available to users.
Fixed field values
Sometimes a field should always carry the same value rather than something the AI Fellow asks the user for, such as an account type, a region, or a setting that never changes for this Connector. Turn on Always send a fixed value on the field, then enter the value.
When a field has a fixed value:
- The AI Fellow never sees or asks for it. Frontierz adds the value to every call, and it cannot be changed during a conversation.
- The value is sent in the format that matches the field type, so a Yes/No field sends a yes/no value and a number field sends a number.
- The Optional setting no longer applies, since the field is always filled.
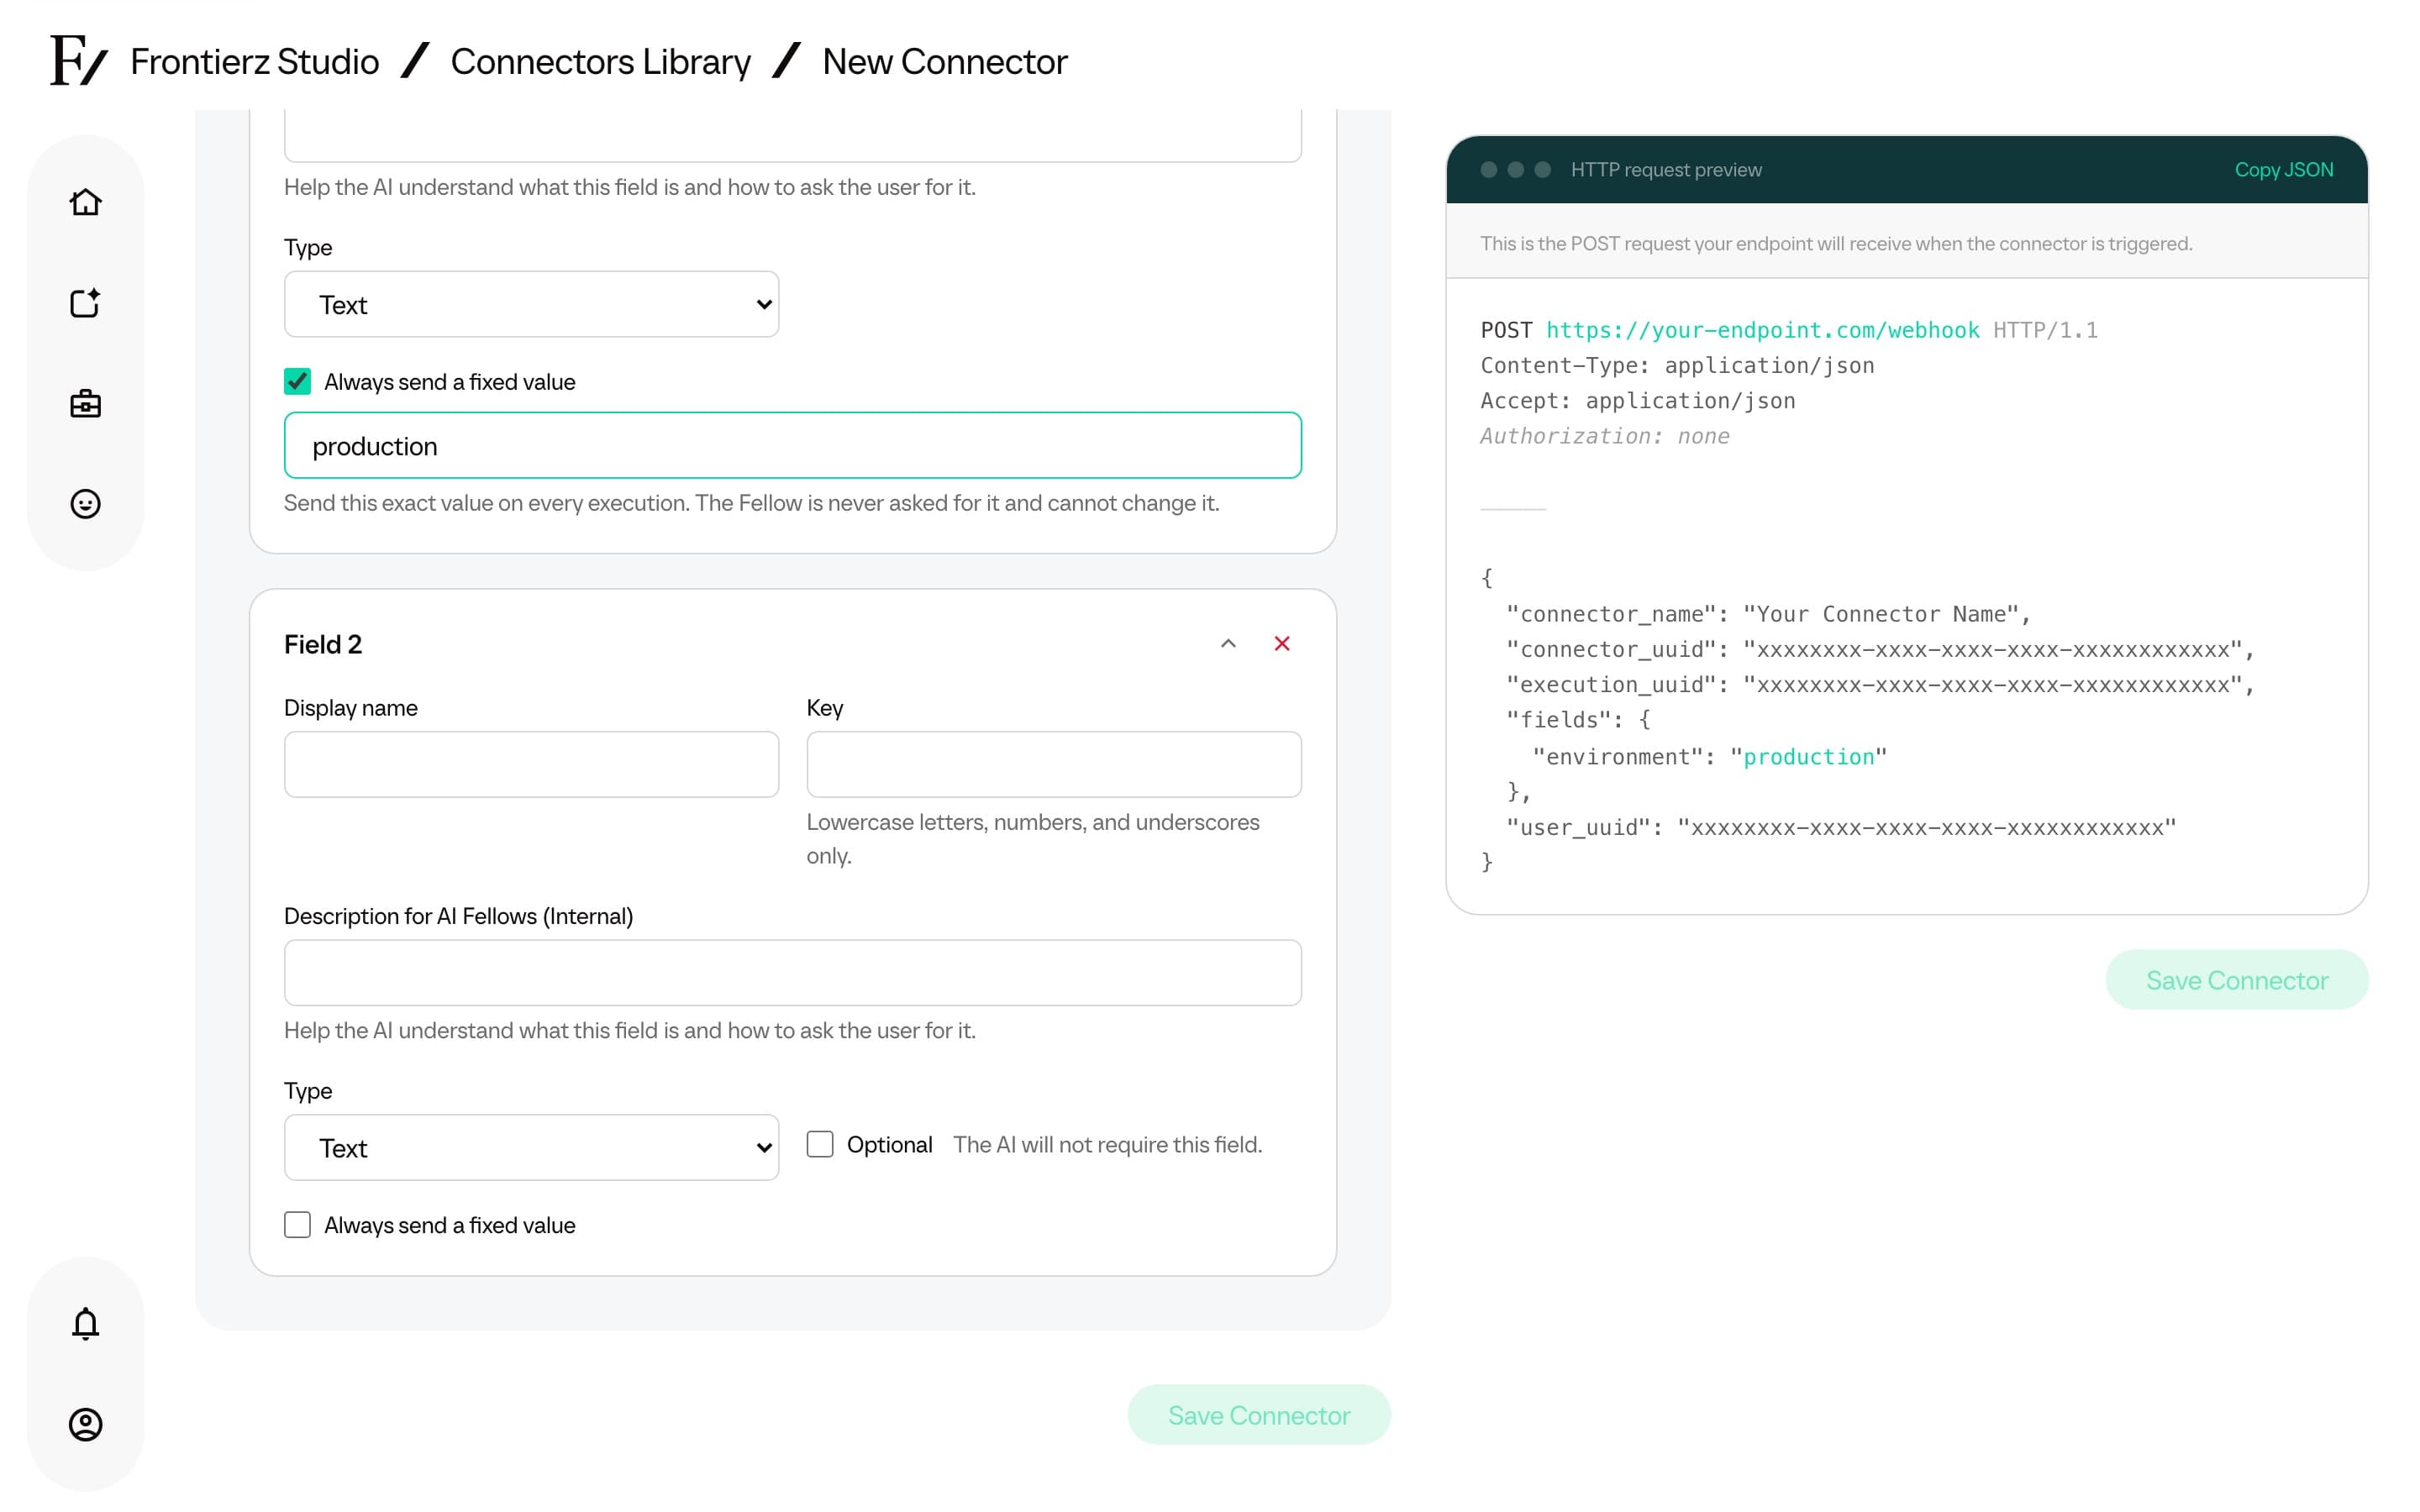
This is more dependable than asking for the value in the field description, which the AI Fellow may skip or send in the wrong format. Fixed values apply to fields you add yourself; fields that an MCP connection brought in automatically cannot be set this way.
Choose how the Connector signs in
The Authentication section applies to both Webhook and MCP Server Connectors.
- Bearer token sends a fixed token with every request, or nothing if you leave the field empty. Use it when the receiving system gives you an API key or token.
- OAuth 2.0 signs in to the service once through its own approval page. Frontierz then keeps the access token and refreshes it automatically.
OAuth 2.0 uses the authorization code flow with PKCE, so someone with an account in the other service approves access in the browser. Services that only offer the client credentials flow, used for machine-to-machine access, need a Bearer token instead.
To set up OAuth 2.0, your IT team first creates an OAuth app in the other service. Then:
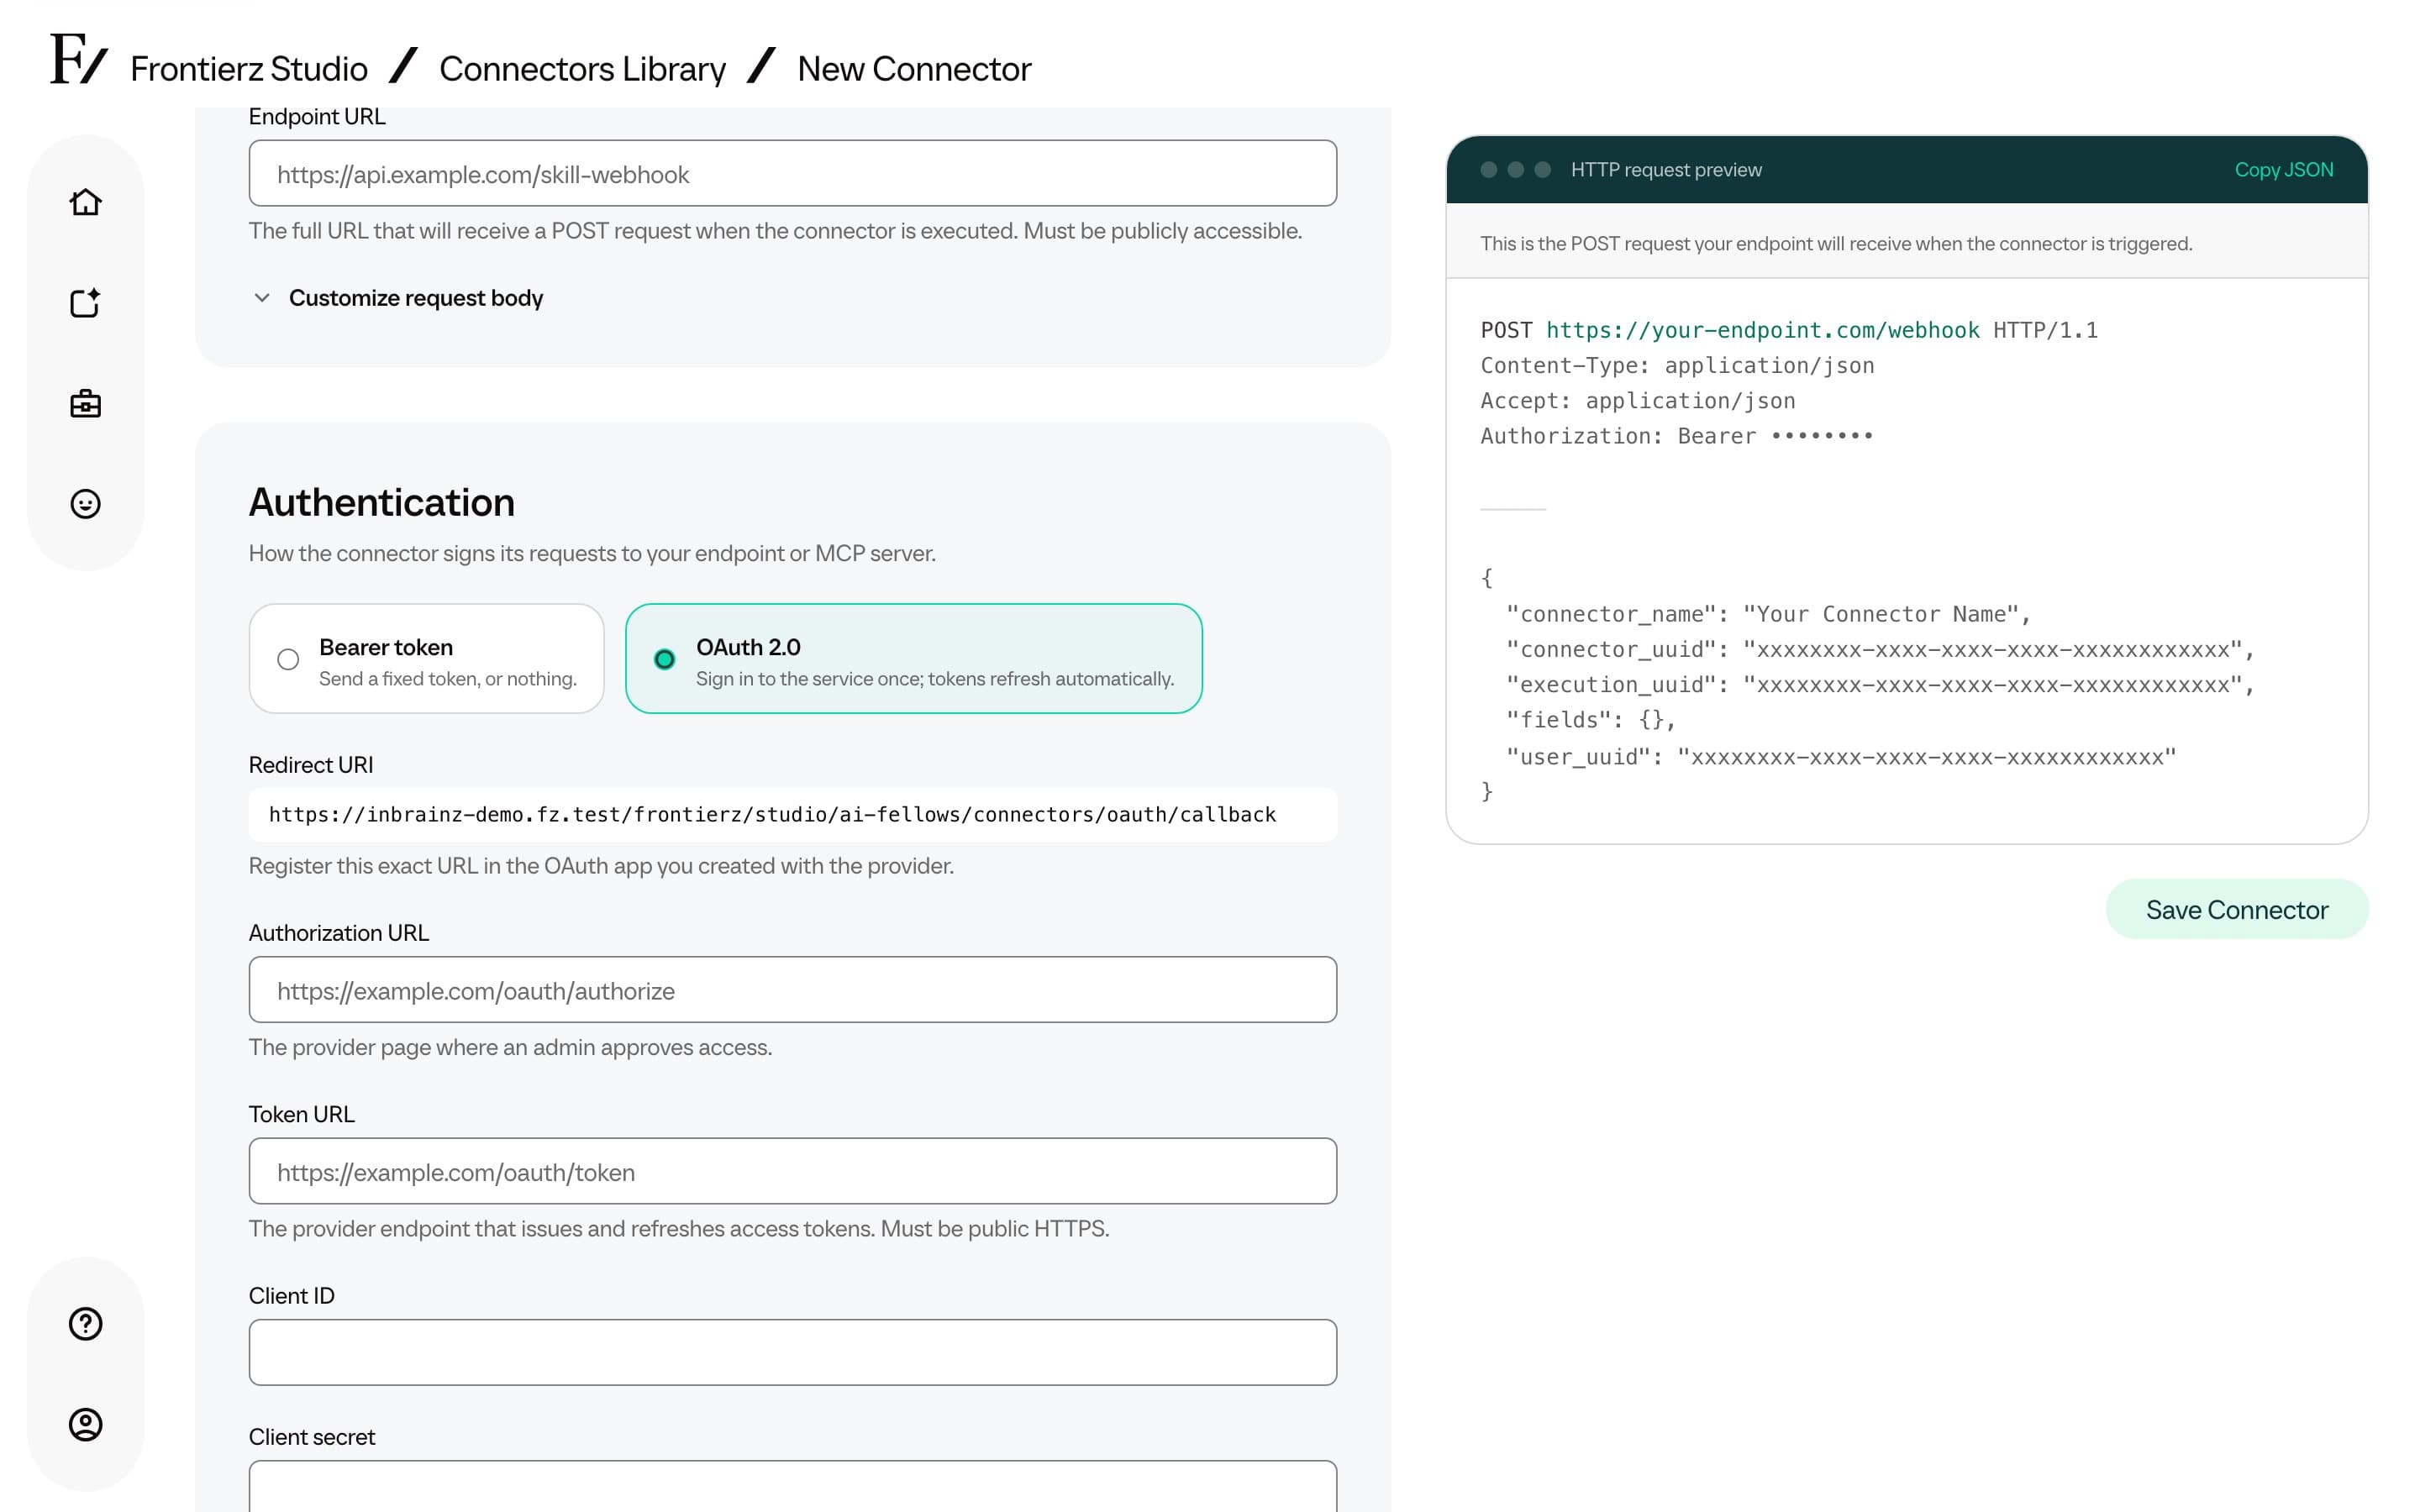
The client secret and tokens are stored encrypted, and the secret is not shown again after you save it. Leave the field blank to keep the saved secret.
If the service stops accepting the refresh, the status changes to Reconnect needed and the Connector does not call the service until an administrator clicks Reconnect. Changing the authorization URL, token URL, client ID, scopes, or endpoint also requires you to connect again. Disconnect removes the saved tokens.
Customize the request body
By default, a Webhook Connector sends a standard JSON payload with the
Connector's name, its identifiers, the collected fields under fields,
and the user's identifier. If the receiving system expects a different
format, open Customize request body in Endpoint Configuration
and write the JSON it should receive instead. Leave Request body
(optional) empty to keep the standard payload. MCP Server Connectors
do not use this option.
Write {{field_key}} wherever a field's value belongs. Available
fields: lists the keys of this Connector's fields. For example:
{
  "ticket": {
    "subject": "{{subject}}",
    "priority": "{{priority}}",
    "description": "Reported by {{user.name}}: {{details}}"
  }
}- A placeholder that is the whole value, such as
"{{priority}}", is replaced by the value in its own type: a number stays a number, and a Yes/No field becomestrueorfalse. A missing optional value is sent asnull. - A placeholder inside other text is replaced as text. A missing value becomes empty text.
- Fixed field values are included the same way.
- The request is always sent with
POSTas JSON. The custom body replaces the whole standard payload, so include any identifiers your system needs.
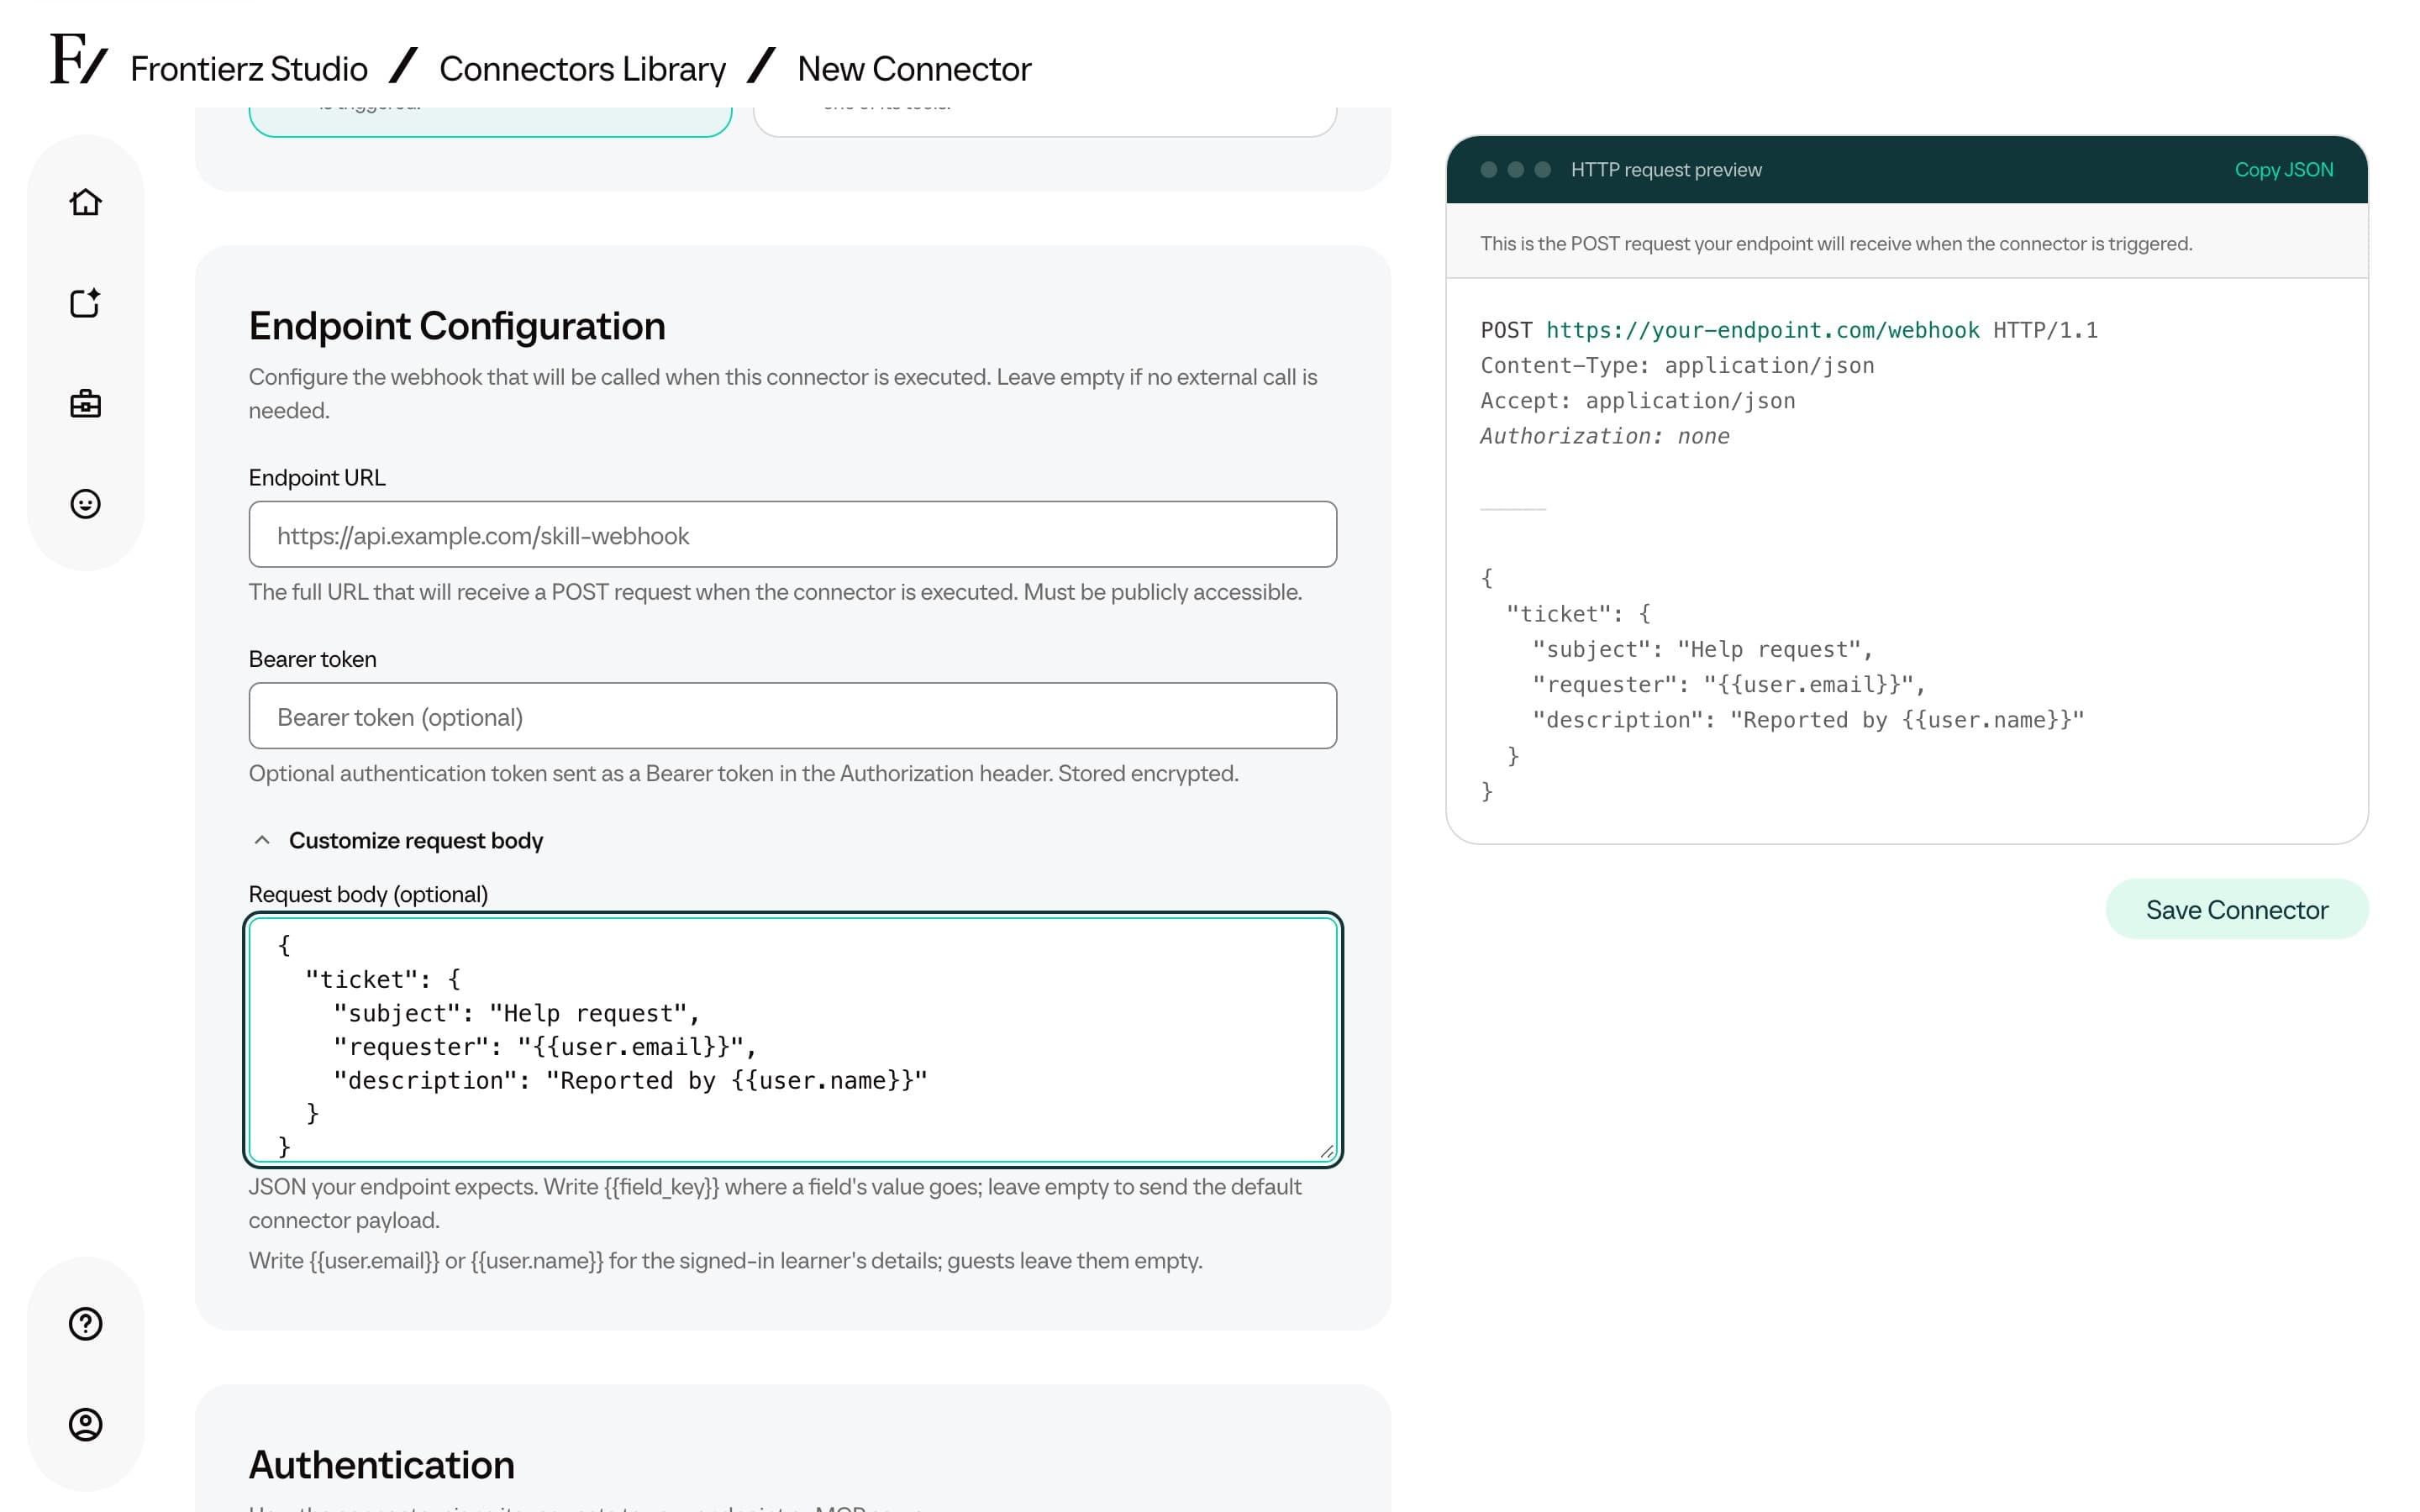
The body must be a valid JSON object or array of no more than 20,000 characters, and it can use only this Connector's fields. Studio rejects the body when it is invalid or uses a field the Connector does not have.
Include the user's name and email
Two more placeholders add details of the person talking to the AI
Fellow: {{user.email}} and {{user.name}}. Frontierz fills them from
the signed-in account, not from the conversation, so the AI Fellow
cannot change them. For guests without an account, such as people
using a public link, they are empty. In a test run, they contain your
own details.
These placeholders send the person's name and email address to the receiving system on every call. Anonymize personal data does not remove them. Use them only when the receiving system needs to identify the person.
What the endpoint should return
For the IT team configuring the receiving service: the endpoint must return a JSON response. An HTTP status in the 2xx range records the call as successful; a 4xx or 5xx status records it as failed. Include the information the Fellow needs to explain the result to the user or pass to another Connector.
Put the result in a message field. The AI Fellow treats message as the
summary of the call and can read it back to the user. A data field works the
same way.
{ "message": "Ticket INC0203044 is open and assigned to the support team." }If the response has no message and no data field, the AI Fellow receives
the whole JSON body instead, so the individual fields are still available. This
matters when one Connector feeds another. A user lookup that returns this:
{ "userName": "Alex Rivera", "userEmail": "alex.rivera@example.com" }gives the AI Fellow the email, which it can then pass into a second Connector, such as one that lists that user's open tickets.
When a call fails, return an error field with a short reason. The AI Fellow
reads that back instead of a generic failure message.
{ "error": "No user found for that email address." }If a Connector result needs to be reused later in the conversation, make sure
those values are in the response. Wrapping them in message is the clearest
option, but any field in the JSON body is available to the AI Fellow when the
response has no message or data field.
Test the Connector before publication
Once the Connector is saved, a real call can be sent to the endpoint without starting a voice session.
Open the Connector detail page from the Connectors Library.
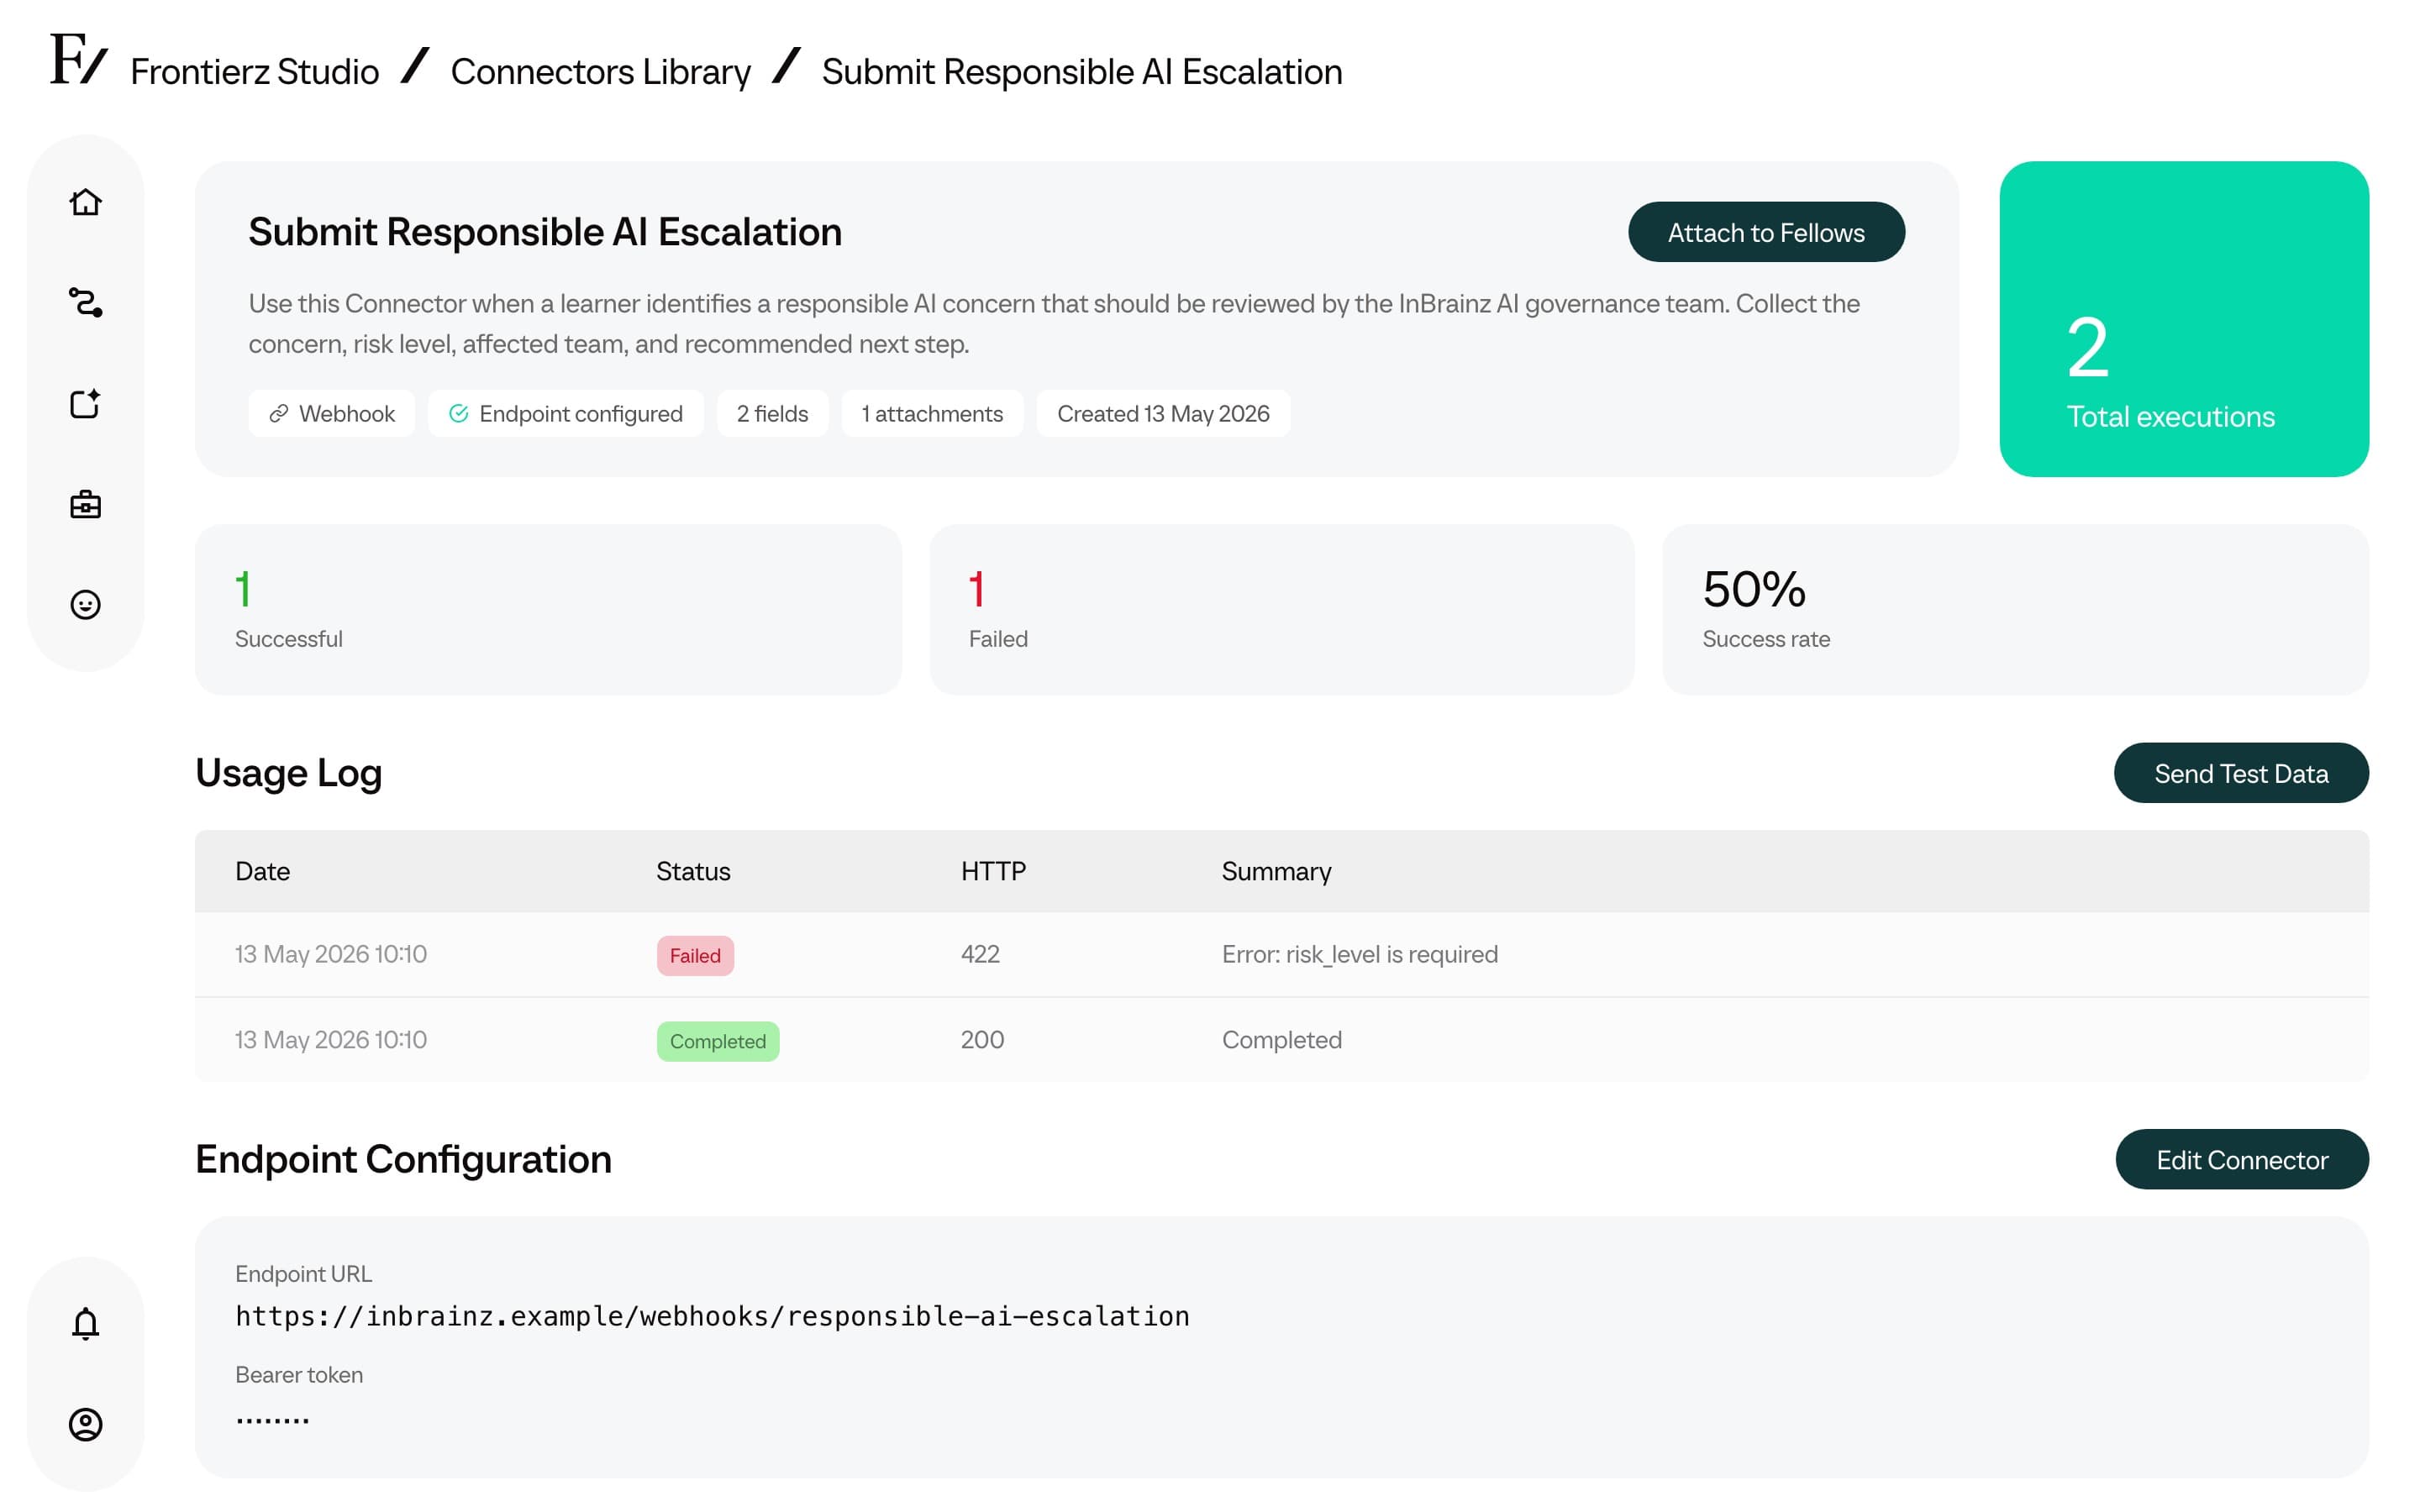
Click Send Test Data.
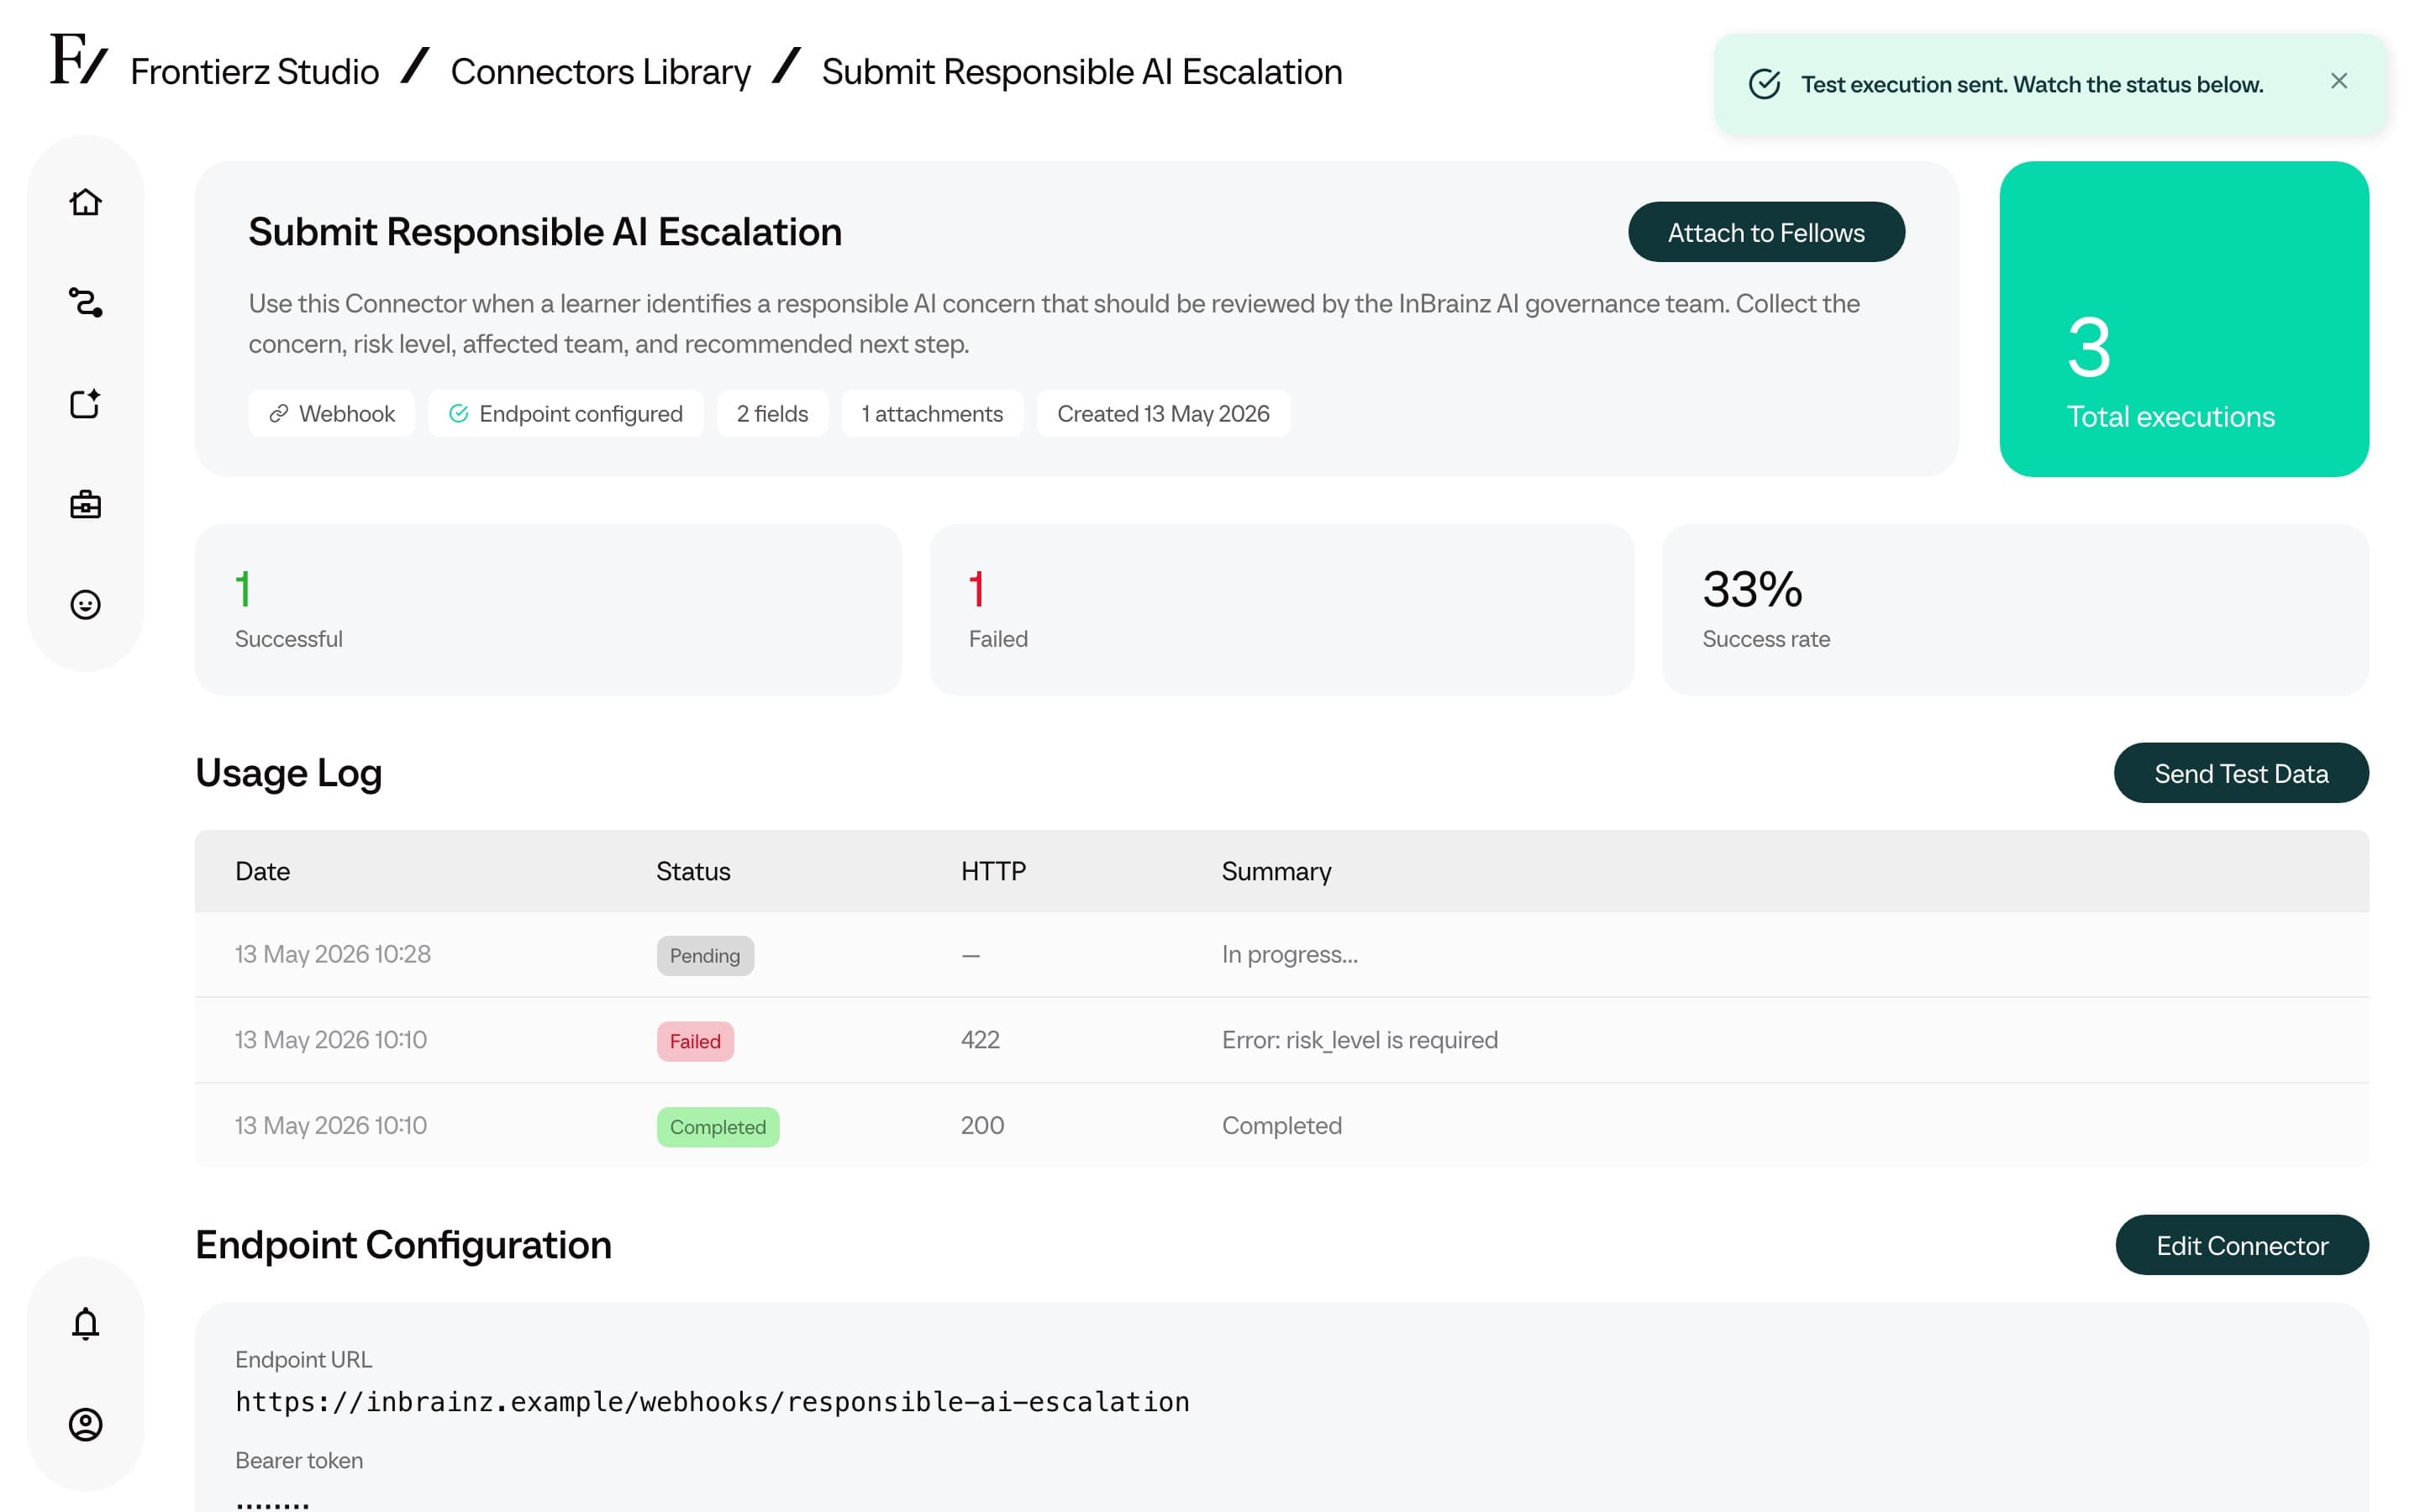
The result appears in the Usage Log log on the same page, with the same payload, response, and status flags as a live run.
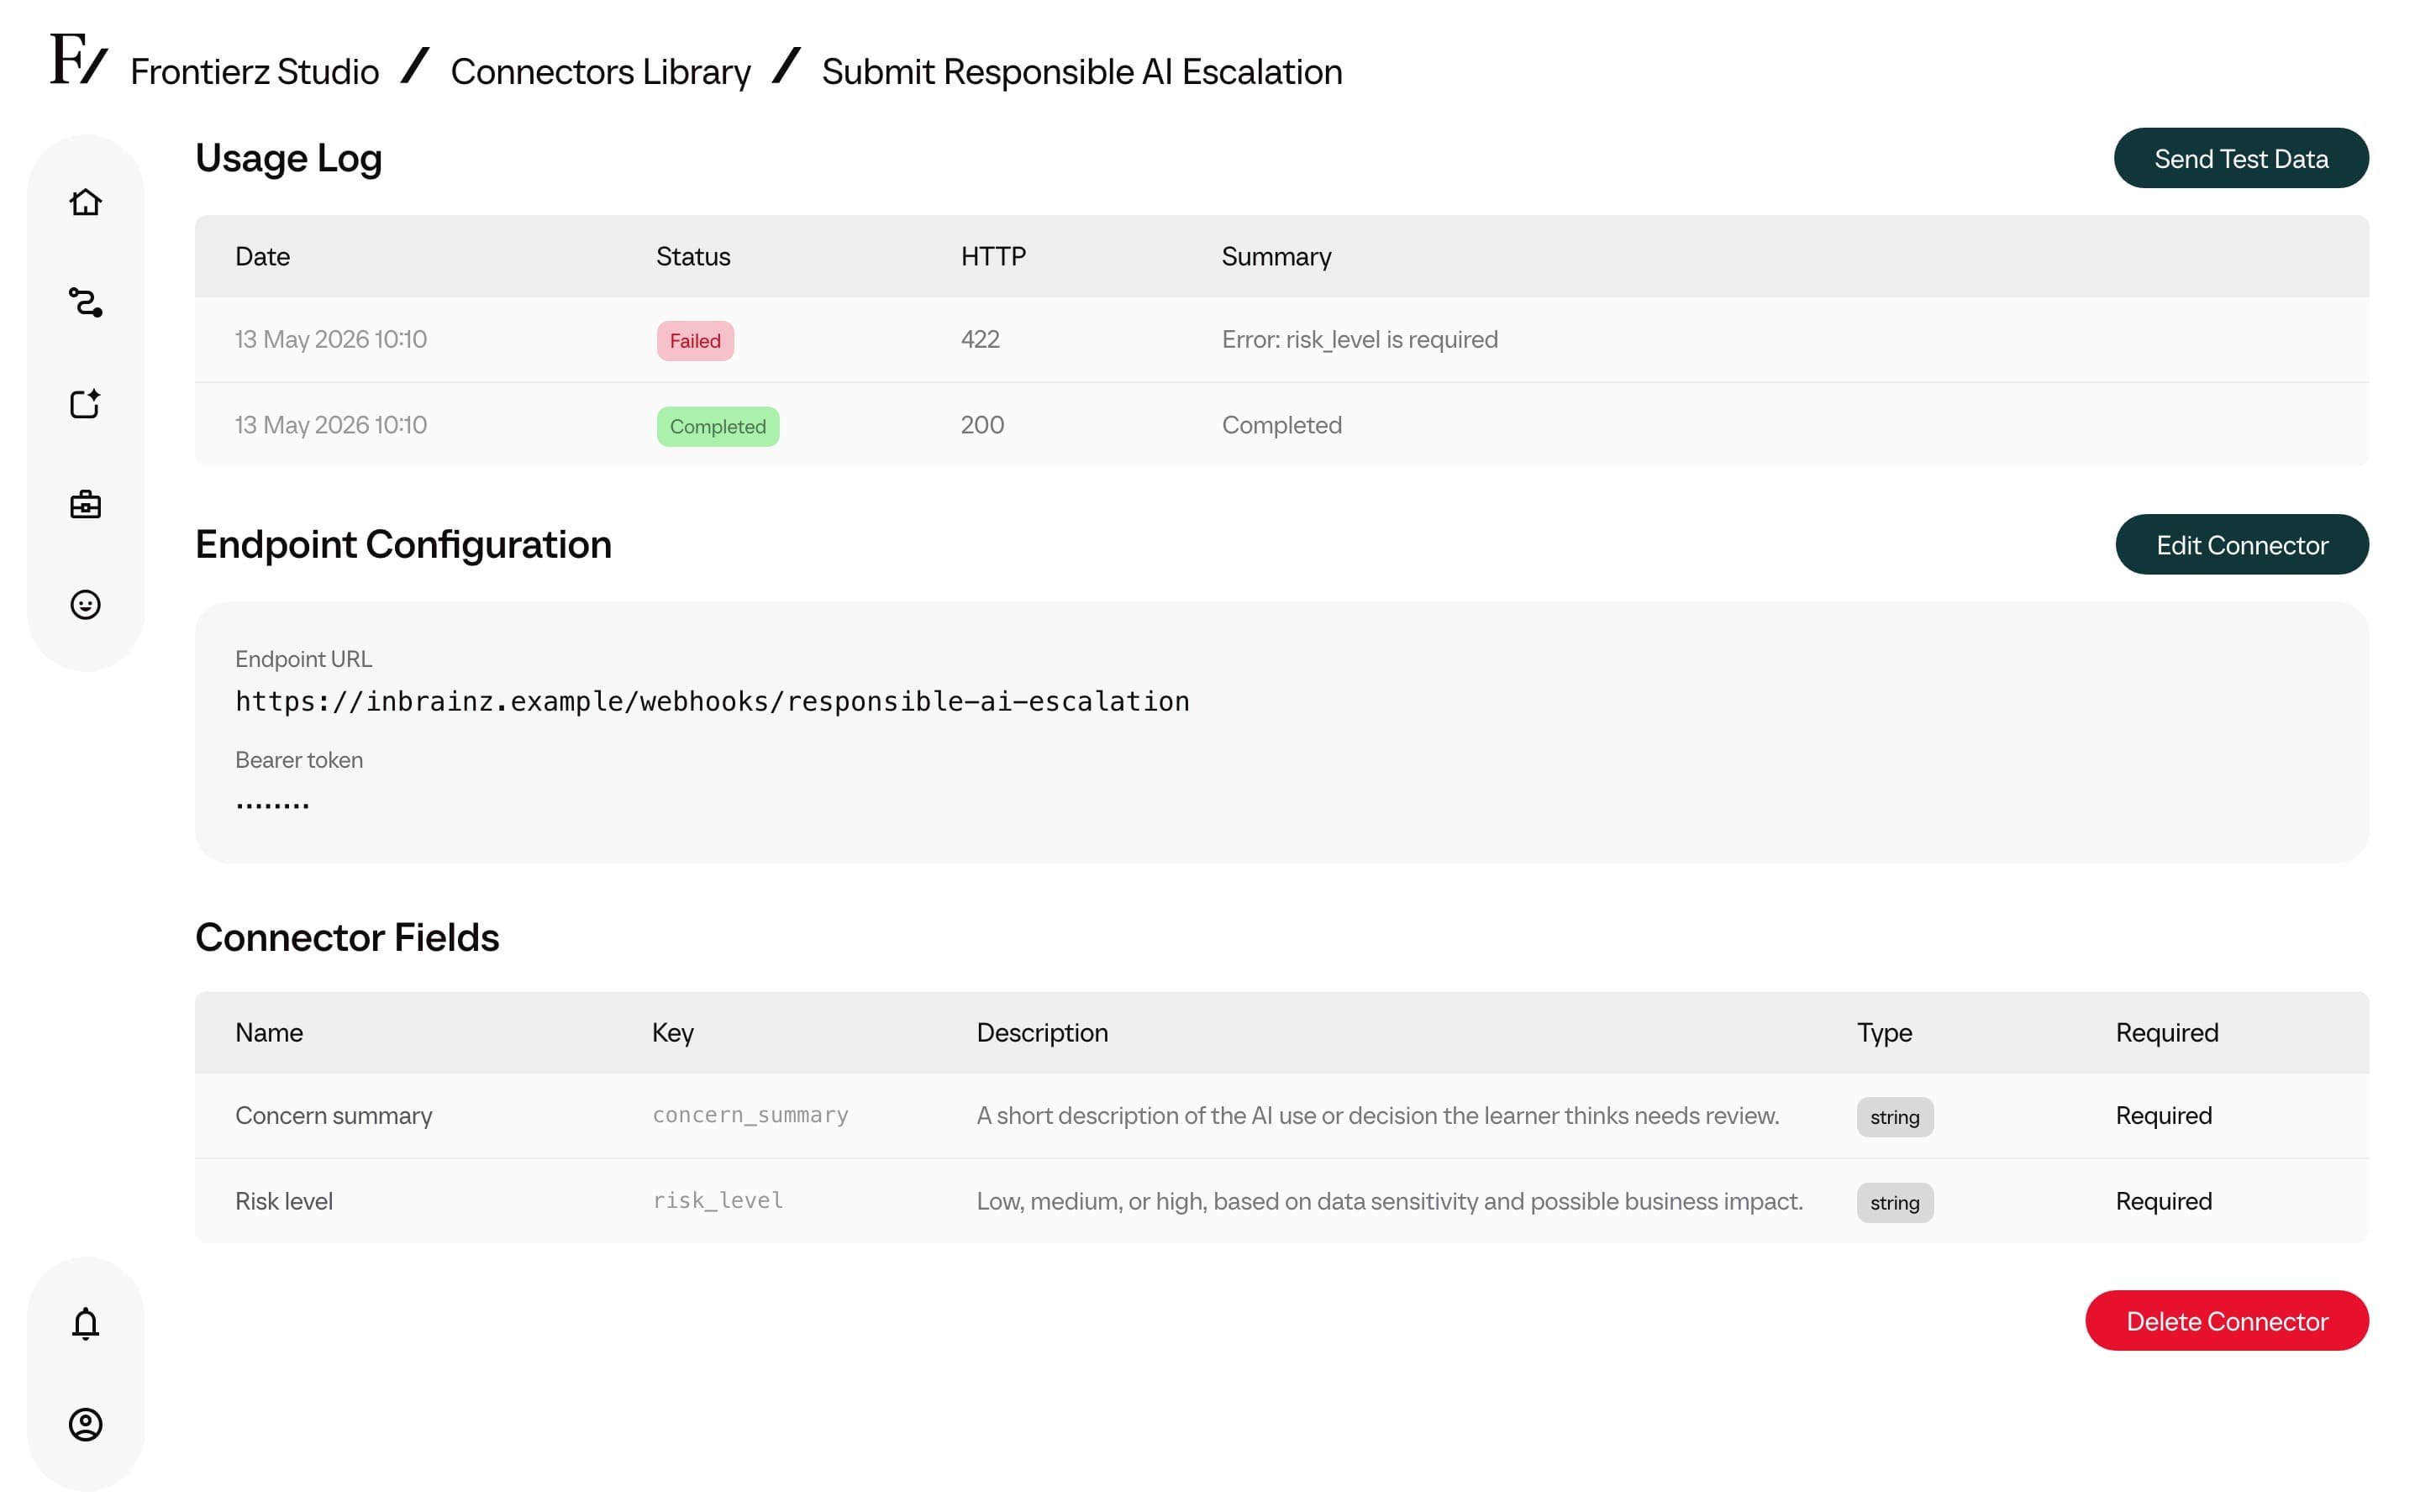
If the test fails, ask the team responsible for the receiving system to check the endpoint URL, authentication token, and required fields against the request and response in the log.
Use it in AI Fellows and Learning Paths
Once the Connector exists, attach it from either side:
- From an AI Fellow, to make it available in that AI Fellow’s conversations.
- From a Learning Path, to make it available across every session in the Learning Path.